
Chronicles
The Tear Down
April 23, 2010
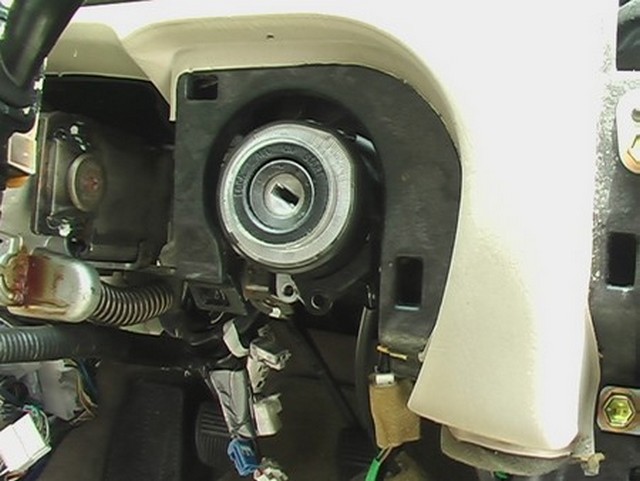
The rest of the tear down consisted of mostly the electrical system. Naturally, I started with that. One of the most important parts of the electrical system was the key because the Solara has a key reader in the ignition switch.
To expose the ignition switch area all you have to do is pull on the cover. That's it. No screws or clips. Nothing.
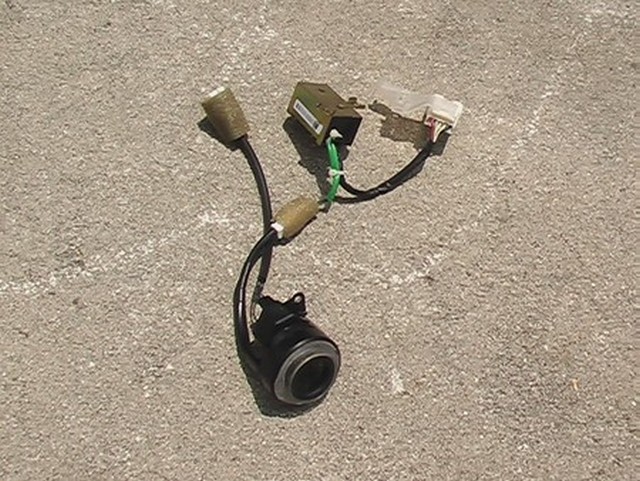
Under the switch is an amplifier and this is what the two look like after removal. Removal was easy. Just a few Phillips head screws.
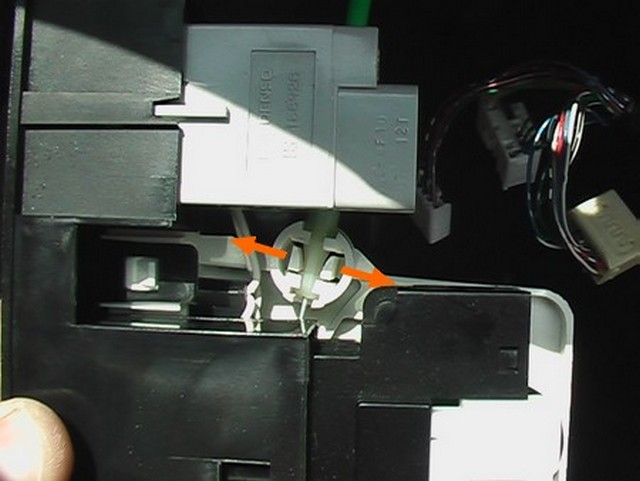
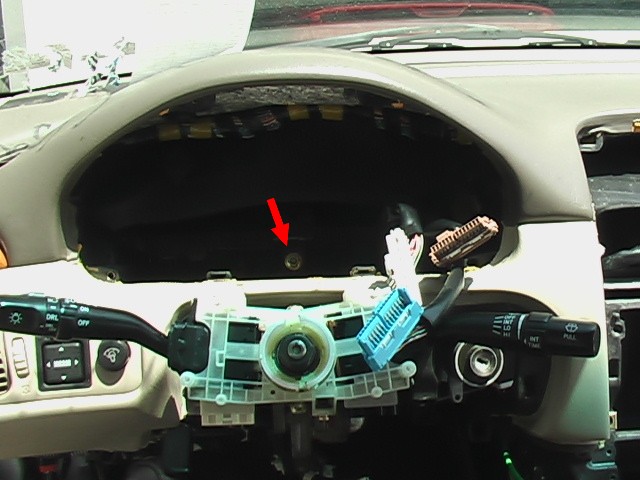
Next up was the AC controller. The Corolla has all kinds of these bicycle type cables for the various doors in the duct work. The Solara however has only one. The others are controlled electronically by switches. This makes it easier. The bicycle cable can be removed by spreading apart the two prongs in the round area in the middle of this picture (the orange arrows). This will allow the green cable to be pulled out backwards.
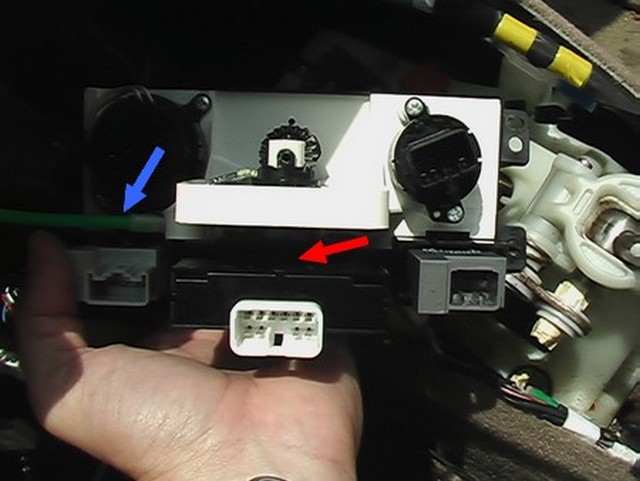
This is the back of the AC controller. The green cable is indicated by the blue arrow and the red arrow indicates approximately where you should pry with a screw driver to release the middle switch. In fact, all of the switches pop out easily, this way. This provides clearance to remove the metal end of the green cable from the arm it is attached to. It is pretty obvious how to do this.
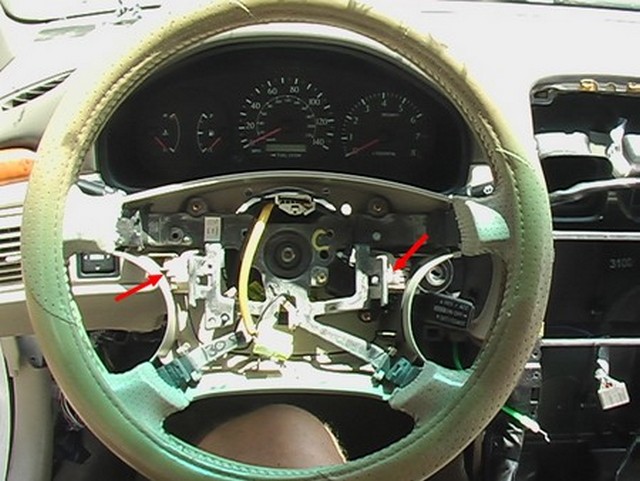
The steering wheel was a lot easier than I thought it would be. The air bag comes out with the two Torx screws (red arrows). Warning! Make sure the battery has been disconnected for at least 90 seconds before even thinking about working on this. The last thing you want is for the air bag to go off. It can kill you. So be careful! All of the connectors associated with the airbag are in yellow as a warning, apparently.
You need a steering wheel puller to get the wheel off, but it was very easy. Maybe a good hard yank will work. Make sure you mark it if you want it to go on in the same location. If you use the yank method, it is a good idea to put the steering wheel nut back on to the shaft loosely so that when the wheel comes off, it doesn't hit you in the face.
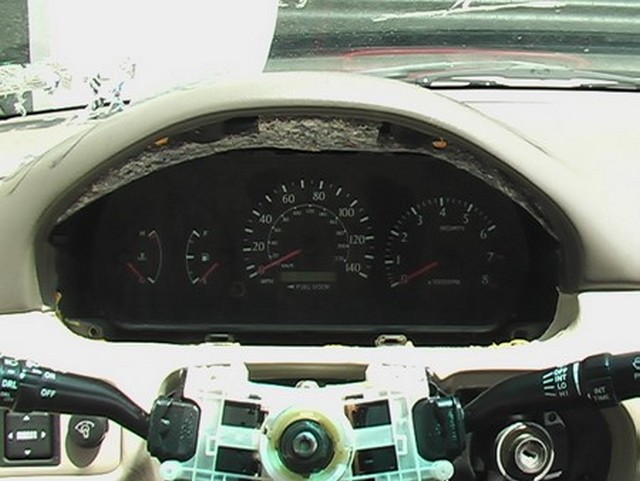
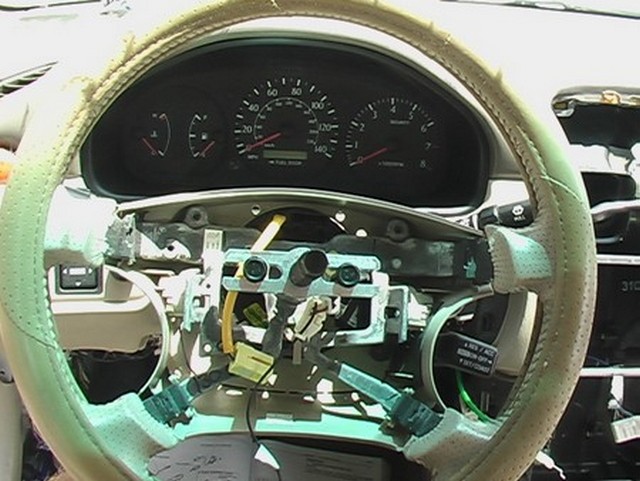
The bezel comes off by removing the two screws at the top and then pulling straight toward you. This is much easier with the steering wheel out of the way. Here you can see the steering wheel, cruise control and spiral cable assembly have been removed.
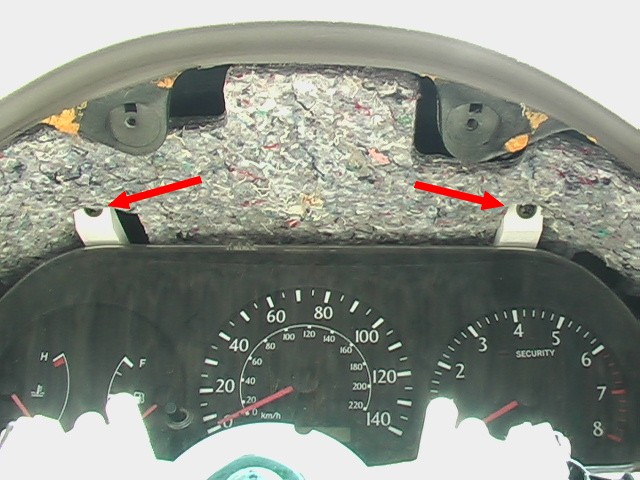
The gauges come out after the two screws (red arrows) are removed. This picture was taken at an extreme angle. They are hard to see and once removed, the white plastic tabs catch when you try to remove the instrument cluster.
Here it is with the gauges out. The bolt marked by the red arrow is one used to secure the dash in the car. To the right are the three connectors that plug into the back of the gauge cluster. Fortunately, they are long enough to pull the gauges out to unplug. The blue and brown one look the same, but they aren't and the three connectors only go in one way.

I've skipped lots of steps here, but it is not my intention to provide detailed steps on how to remove a dashboard. I consider this all one big step to remove the necessary wiring. There is a procedure in the Toyota manuals. Here is the dashboard finally coming out. The wires are snaked behind there and held with clips. It is hard to separate the two and in fact, I only finished the wire bundle removal after the dash was out of the car.
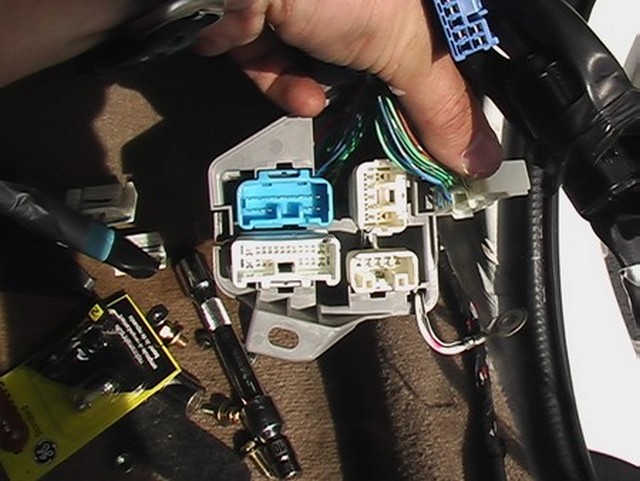
On both the left and right sides where ones feet go, what's called the rocker panel or kick panel, are these junction blocks. The wires don't connect into them, they connect to each other and then there is a little clip that holds the connectors in this box. In other words, you don't need the container to plug the wires in. This is the one on the right.
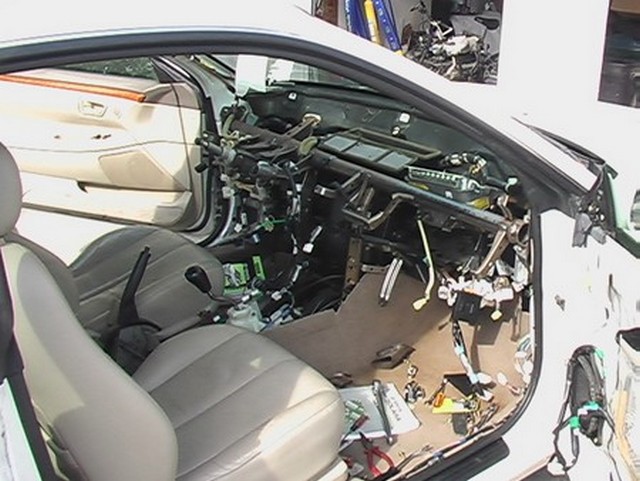
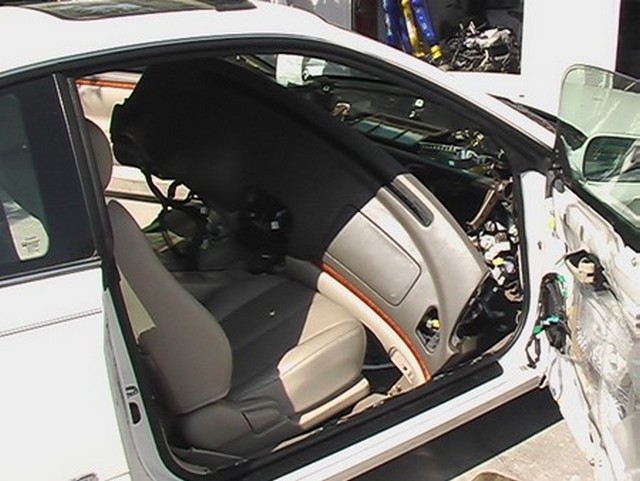
Above is what the car looks like with no dash. This is the first time I've ever removed an entire dashboard before!
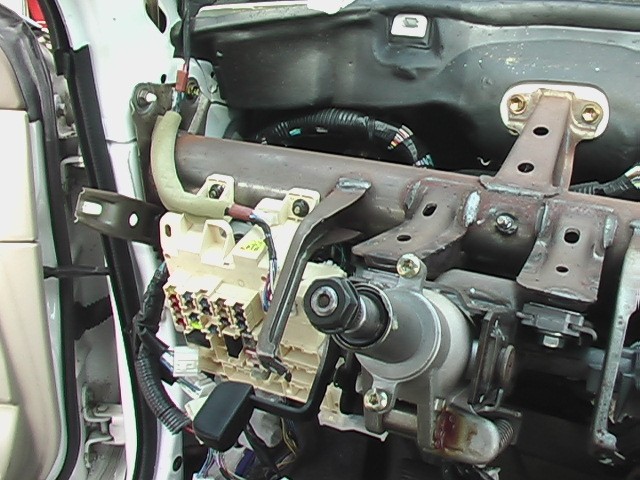
The main junction block is to the left of the steering column and must come out. There are a lot of connectors meeting here, from in front, in back and underneath. Just off the picture to the right, is the ignition switch. It is held to the steering column by two bolts that have rounded heads so they can't be easily removed. The way you're supposed to get them off is to drill a hole in the top and use a screw extractor on them. Instead, I welded a screw to the top and then extracted them using that screw. I don't really see the importance of having rounded bolts here, so I just used two socket head screws instead when I installed it in the Corolla.

The wires go through the dash. At the bottom of the picture, is the defroster duct and above them is the AC ducting that goes to the passenger cabin, left and right. They must all be removed to get the wiring loom out.
And I finally got the wiring harness out. Well, just the piece under the dash. There was pleny more.
April 26, 2010
If you ever wake up one day and think to yourself, hey, I think I'll remove all of the wiring in a car today, my advice to you is DON'T! Seriously, don't do it. It's a tough job. The wires go everywhere and even if you don't need some of them, they will surely be bundled together with ones you do need.
I started inside the right hand side of the car and got in and out several times working the wires out through the body. Then I worked my way around the front of the car from right to left.
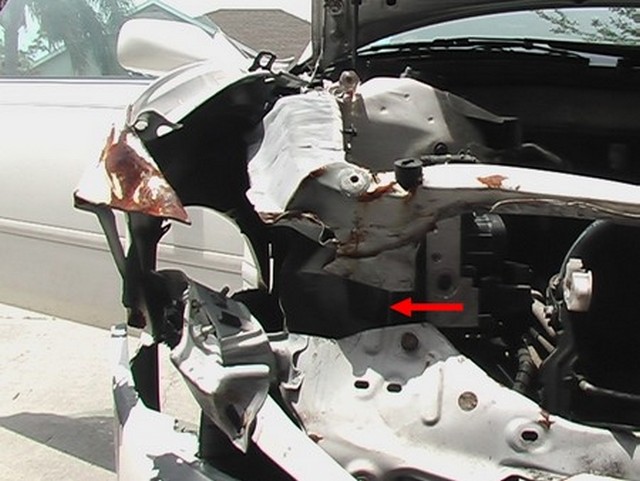
When I got to the damaged headlight, I had to cut part of the body away with a saws-all (red arrow) in order to get the wiring through the otherwise too small hole.
As you can see, I worked my way around from above the condenser and to the other headlight.
Once I got to this point it was clear that I needed to unplug some of the connectors from the underside of the fuse box under the hood. I marked the bundle as coming from the fuse box, but it was unnecessary to mark each one, because all of the connectors under the fuse box are unique. So as long as you know they belong there, it shouldn't be hard to figure out which one goes where.
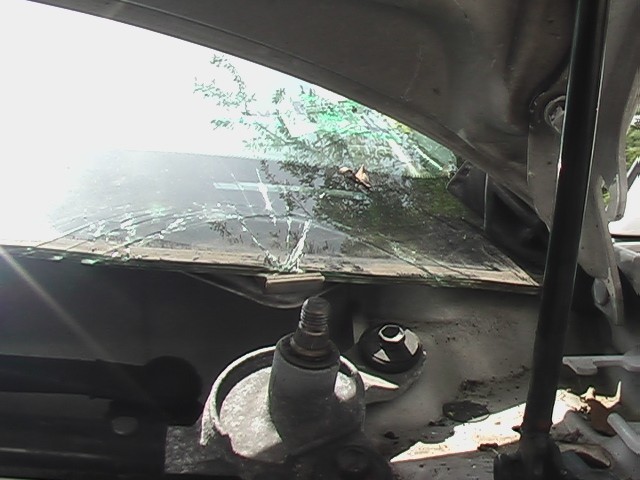
Warning! If you are trying to remove your windshield wipers, the windshield extends for about 1 inch under the plastic wiper cover. It's much further than you might think it does and it is virtually unsupported. Cracking the whole windshield is easy if you pry in this area. Don't do it!
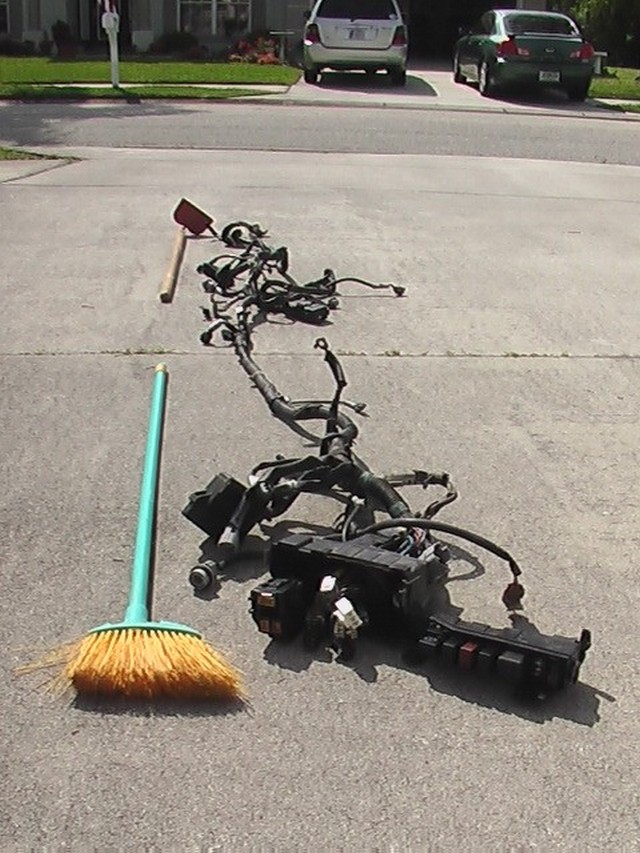
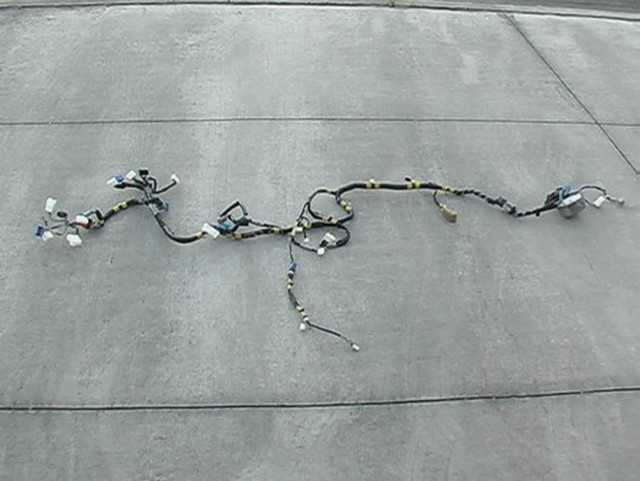
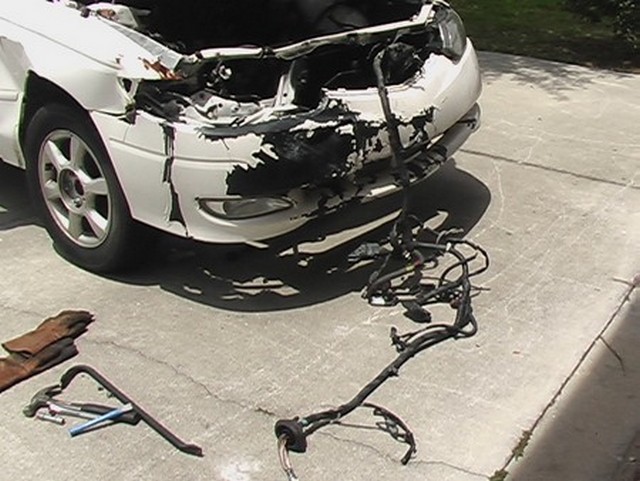
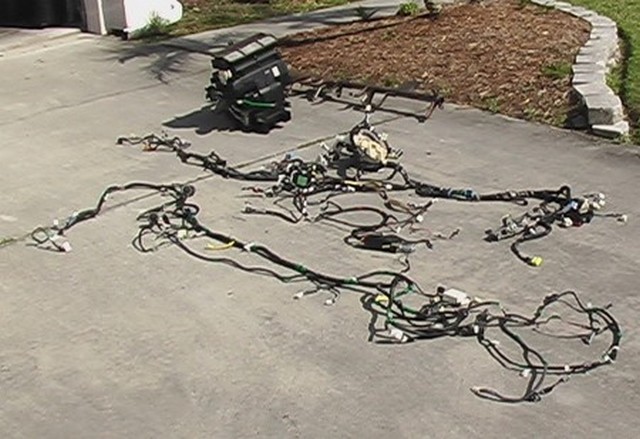
Anyway, I managed to remove the front wiring, which terminated at the fuse box. Here it is all strung out across the driveway. It is longer than a hoe and a small broom put together (the international standard for measuring wiring looms).
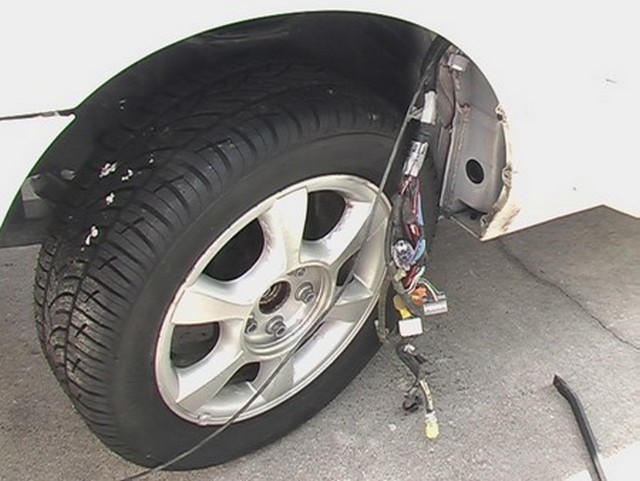
So, continuing on around the front of the car, I found myself at the other wheel. After pulling this through into the interior of the car, a whole new level of torture awaited.
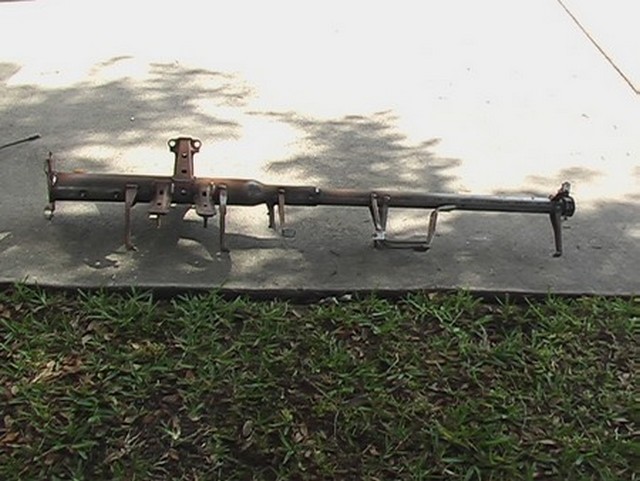
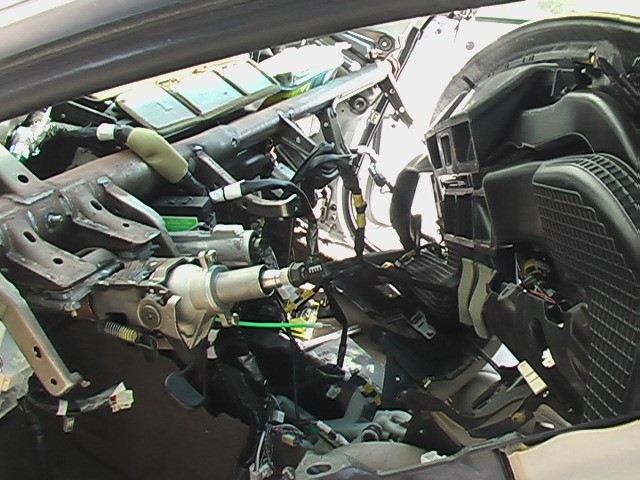
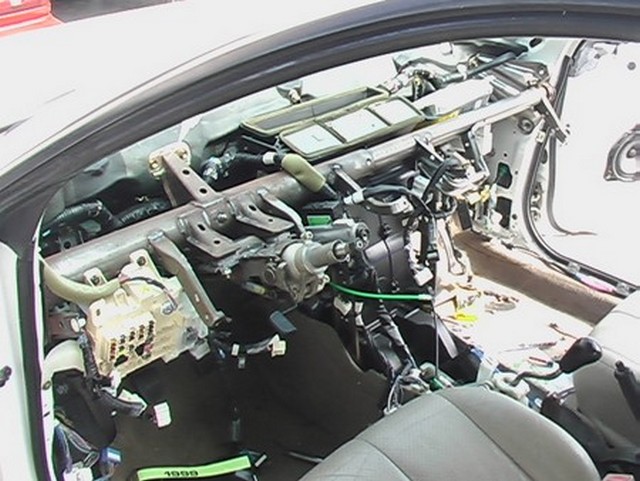
I removed the dashboard support, to better get at the wiring. Here's what it looks like.Unfortunately, the wiring continued along the firewall behind the air conditioner, meaning that the AC would have to come out before the next portion of the wiring loom. After that I still had the wiring to the back of the car. In there are the speaker wires, which I don't care about, but there is some wiring I do care about, like the fuel pump and the wires to the VSV's on the charcoal canister. So it will have to come out too.
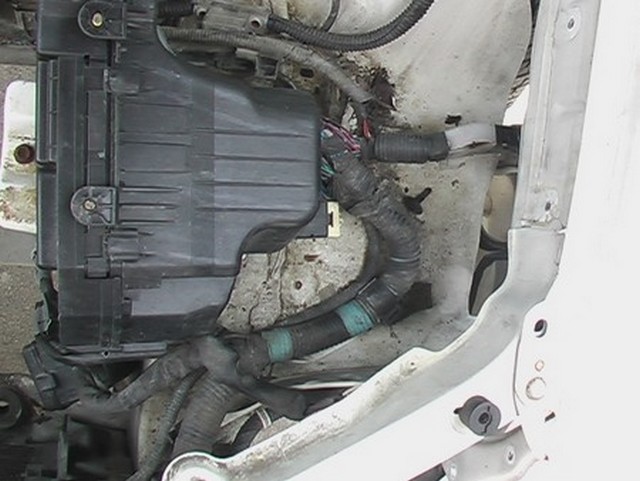
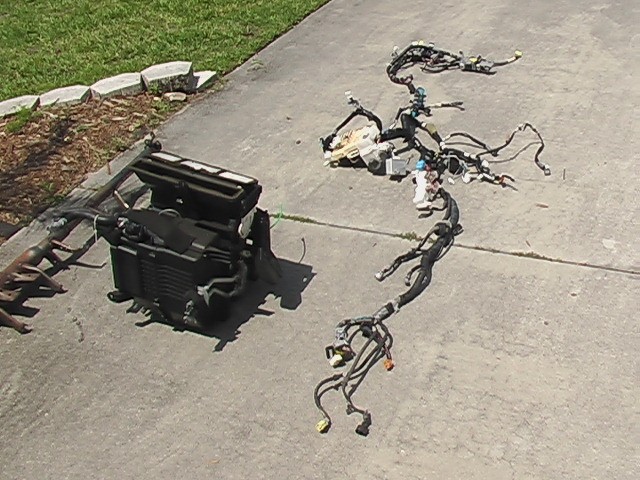
Here's what it looks like with pretty much only the AC unit in the middle. It takes up quite a bit of room and putting it in my Corolla was quite a challenge. It takes up a lot of room and will not fit in the middle of the dashboad. It's too big and has to be offset to the passenger side. I recommend using the Corolla unit if possible.
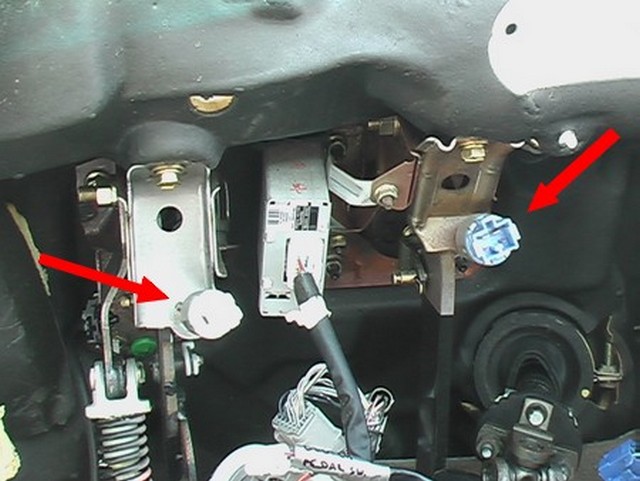
You can see the switches that mount to the brake and clutch pedals. These are needed for proper operation of the cruise control. I will probably need these in the Corolla. Note, the one on the clutch is not the one used as the neutral start switch. That one is below the clutch pedal near the green disc in the picture.
To remove the AC unit from the Solara I had to remove these funky clips from the aluminum tubes that pass through the firewall. The book says you need an SST (Special Service Tool) to remove them. Usually, when I encounter the need for an SST, I either find something else that will work or I build one myself. In this case I think the SST was really ridiculous. As it turns out, all you need is a hook.
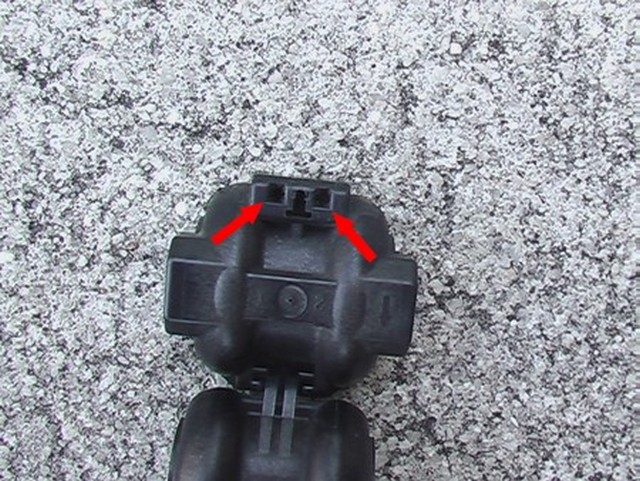
The book showed that the SST had two prongs that would stick into two holes and release a catch, then the SST had a little hinged lever used to crack open the connector. After taking a look at it, it turned out all that was needed was something pointy to push a metal catch in and then the connector would just pop open.
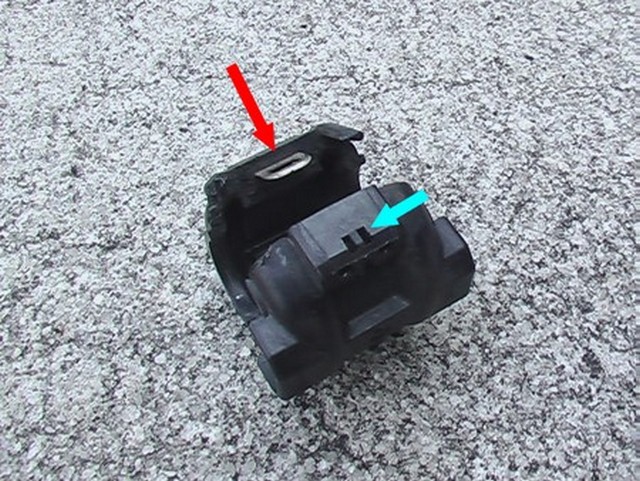
In the first picture, the holes where the prongs go are marked by the red arrows. But the only purpose of this action is to push the metal connector shown in the second picture in the direction of the red arrow. But this can be done by sticking something small in one of the two slits marked by the blue arrow in the second picture. Then with a little coaxing using a screw driver or something, the connector pops open in a clamshell fashion. Easy as pie. After the connectors are removed the book says to use your hands to separate the two sections of tubing, which I did.
Once I had the lines separated, I was able to pull out the AC unit and the wiring that ran behind it. Here is a picture of both.
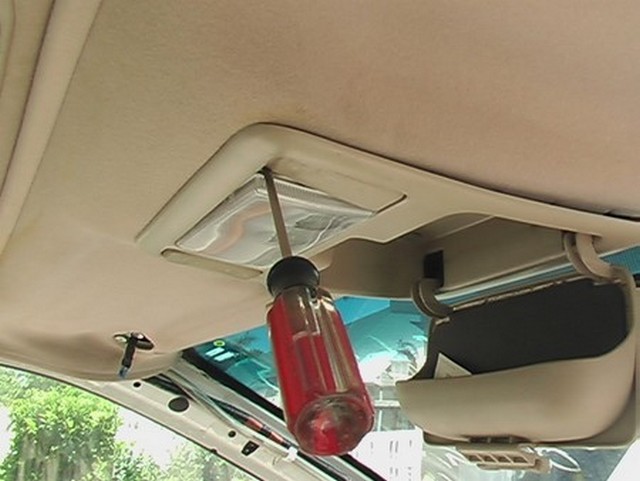
Here's a tip. If you ever have to change out the light bulb in the dome light or for some reason remove the light, you have to pry the clear cover off to gain access. To avoid scratching the plastic, you can press the light button and stick the screwdriver in at that point. It gives you easier access and if you do scratch the plastic, the button will pop back up and cover up the damage. Toyota recommends taping the end of the screwdriver and while it can't really hurt, I find that it can still easily damage the plastic. It's your choice.
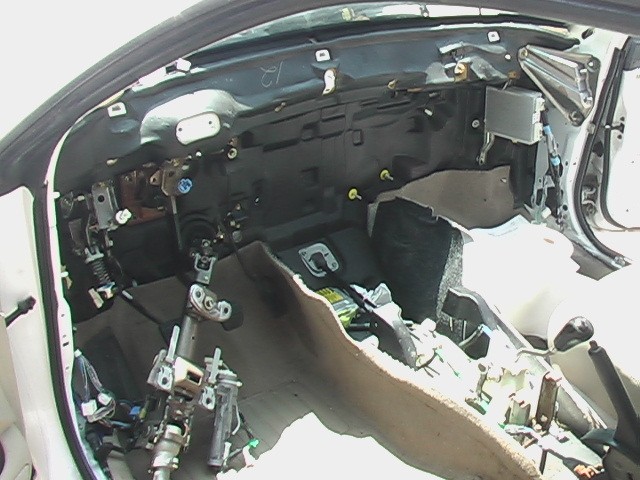
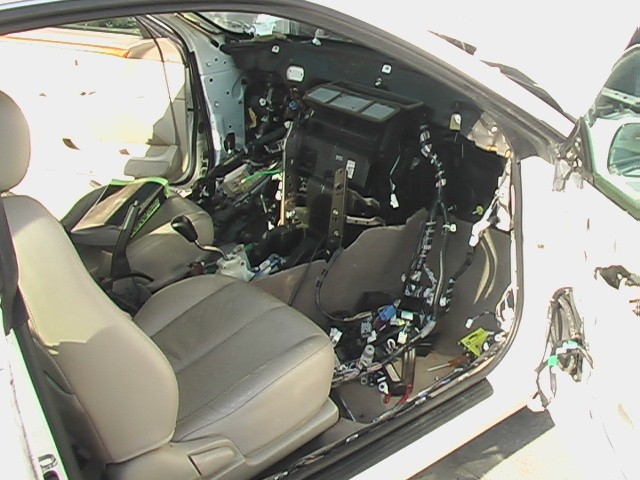
And here's what the Solara looks like with no dashboard. Wow!
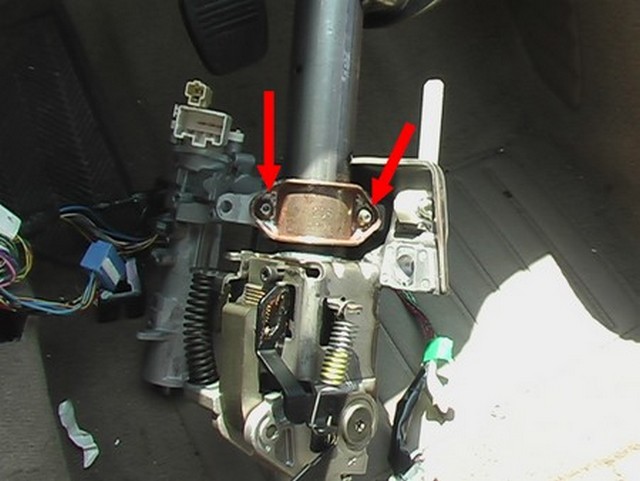
Here you can see the underside of the Solara steering column. To get the ignition switch out, you have to remove the two "bolts" marked with red arrows. The book says to drill holes in them and use a screw extractor (a.k.a an easy out). This didn't work for me, so I welded a bolt to the top of each of them and then removed them with a socket wrench. I'm not worried about someone trying to steal the car in this manner.
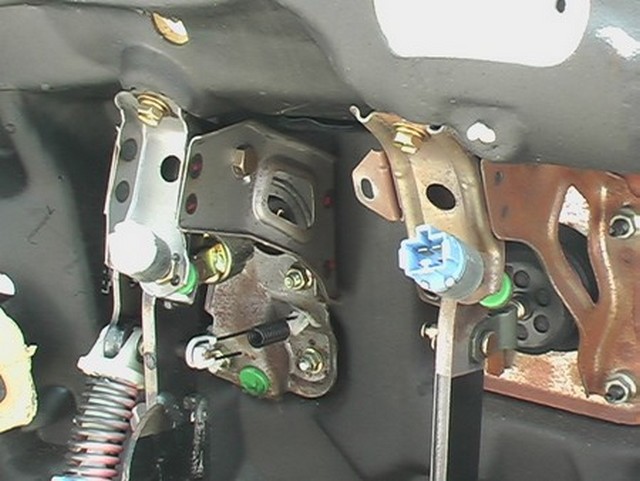
Here is another shot of the tops of the Solara pedals. There is a switch for every green pad seen in the photo. If you get a donor car, it's a good idea to take these green pads too. If one of them breaks (they disintegrate with age and use), you can lose your brake lights, your cruise control or even the ability to start the car and it's annoying, so it's a good idea to have a couple of spares on hand.
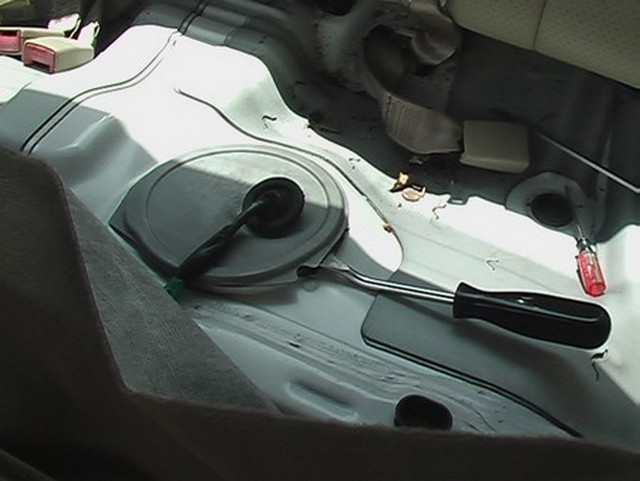
Here's how you get to the fuel pump. The cover, under the back seat is just gooped in place, so using a screwdriver or something to pry it up is all that is required.
If you remove the little screws around the outside, the plate comes out and with it a long stalk on which is strapped the fuel pump.
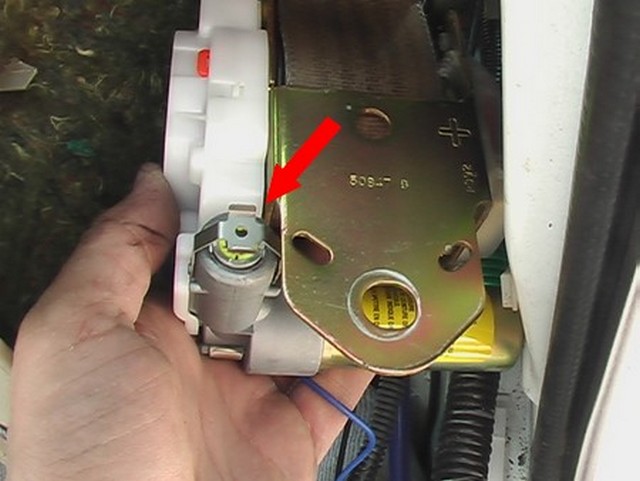
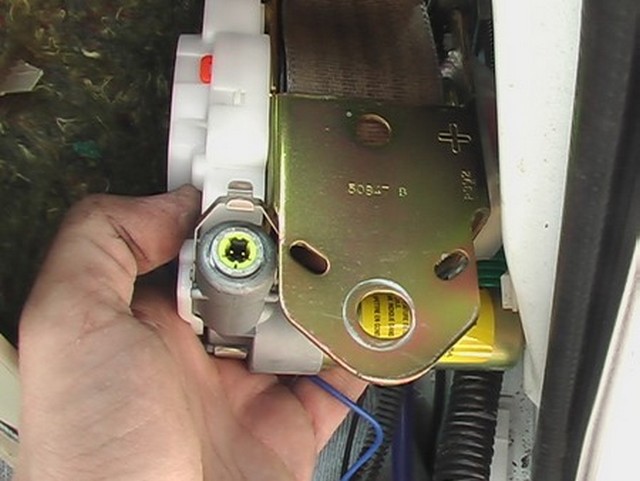
If you ever want to remove the electrical connector that goes to the seatbelt, all you have to do is rotate the little cover (red arrow) and unplug it. The Solara comes equipped with seat belt pretensioners controlled by the SRS system. The Corolla doesn't have this. It's already unplugged in both of these photos.
To me, looking at this wiring I wouldn't think it was that bad taking it out, but I can't tell you how many little plastic clips were holding the thing in, each one nearly impossible to get at from behind where you need to release it. I can't tell you all of the things you have to remove to get the wiring out from behind, how many things you have to mark so you don't forget where they went, how many little holes you have to squeeze connectors through, etc. Trust me, this is a ton of work.
I actually broke most of those plastic clips. As I may or may not have mentioned, I prefer to de-construct, rather than demolish. You never know when you will need something and nothing burns my butt more than having to go to the dealership or parts store to buy something I just threw away. When I put the new wiring in the Corolla, I plan to run a few extras to the various places in case I want to add functionality.
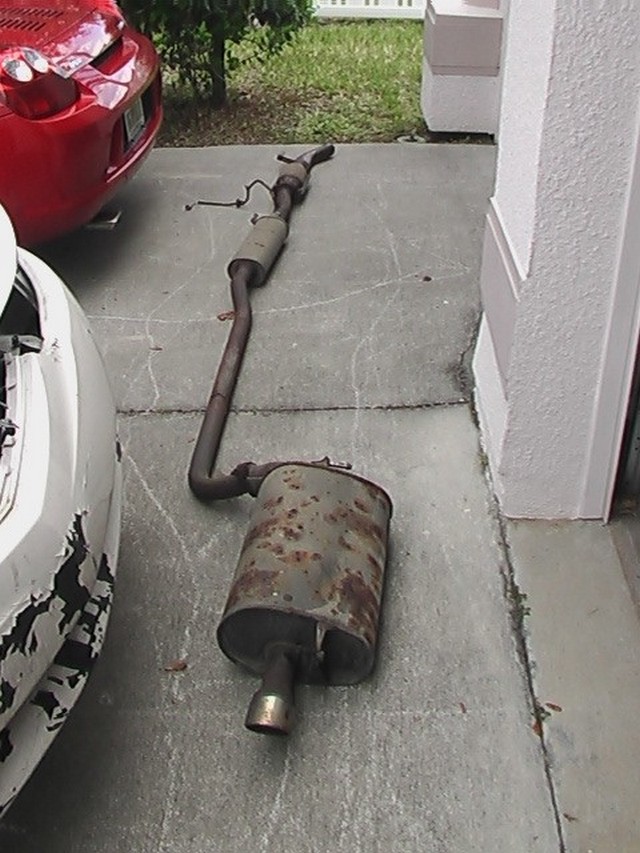
Not much to comment on here. It's the Solara exhaust removed from the car.
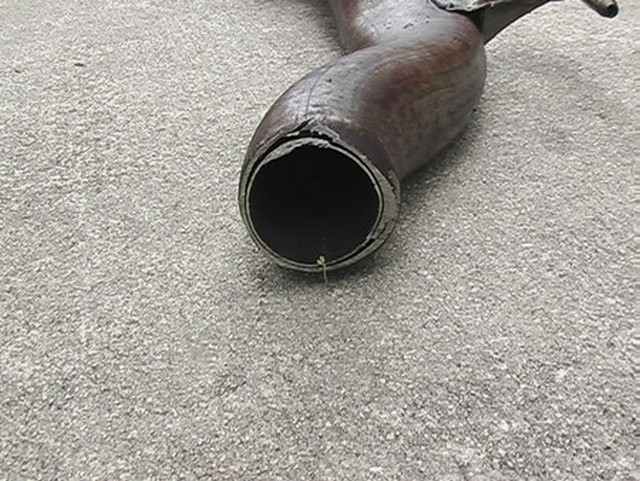
The exhaust appears to be pretty high quality to me. It is double walled. I'm not sure if this is done for corrosion, muffling, heat shielding or some other reason, but I think I'll just use single walled tubing with heat shielding.
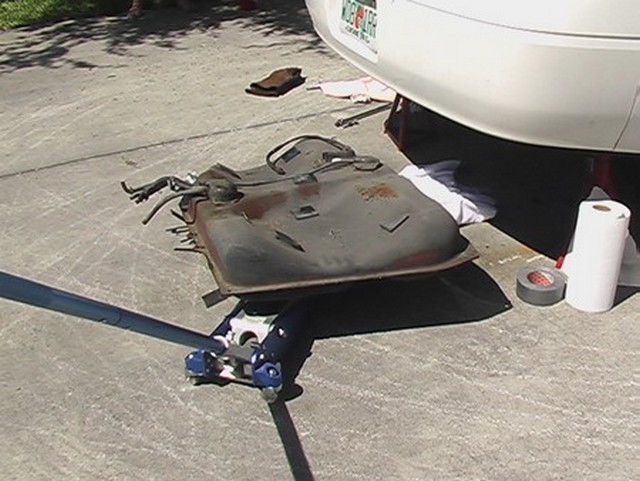
With the exhaust system out, the gas tank was actually pretty easy to remove. It's just uncomfortable because there was still quite a bit of fuel left in the tank and I'm always a little uptight working around gas. I put a sheet under it to drag it out from under the car, to prevent any sparks.
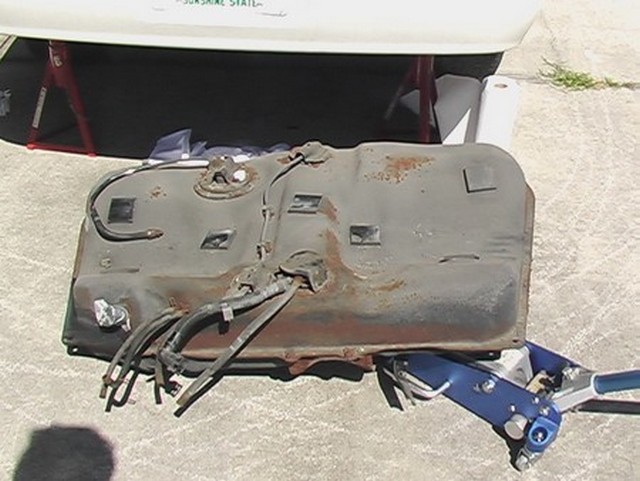
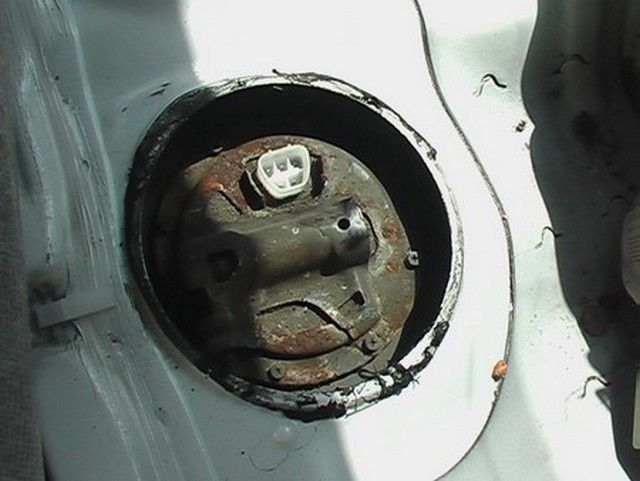
You can see that there are a total of four items on the top that I need. All of them have protective covers over them and I broke one of them getting it out. Incidentally, they come straight out. They are pressed into a rubber grommet in the top of the tank. Apparently they are tight enough to seal.
From viewing these pictures, you can see a couple of problems. The Corolla only has three holes on the top of the tank, so a fourth had to find a home there. Plus the Solara, has two lines next to the fuel inlet and the Corolla only has one. Finally, the hole for the fuel pump assembly is much smaller on the Corolla than on the Solara. See the gas tank section for how I handled this. Of course, if you don't care about emissions, this problem would be a lot easier for you. I want to get the entire system working exactly like it did on the Solara, so for me it is a problem.
On a different note, look how rusty this thing is. Just another reason to live somewhere warm!
September 10, 2011
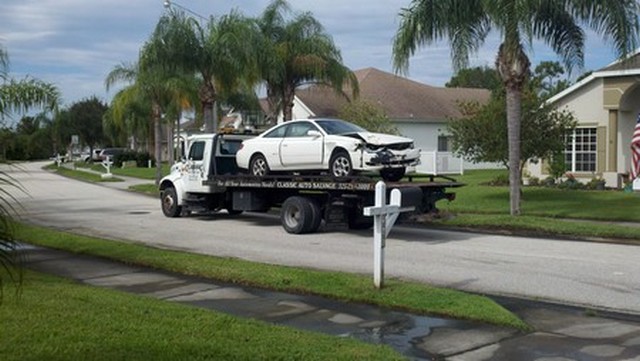
After a complaint from my home owner's association, I finished up the last of the work, grabbed a bunch of the fasteners and bit parts I thought I might need and sold the rest of the car to a salvage company. Bye bye, Solara. Thanks for all the parts.