
Chronicles
Solara Engine Removal
April 10, 2010
I started by removing the engine from the Corolla.
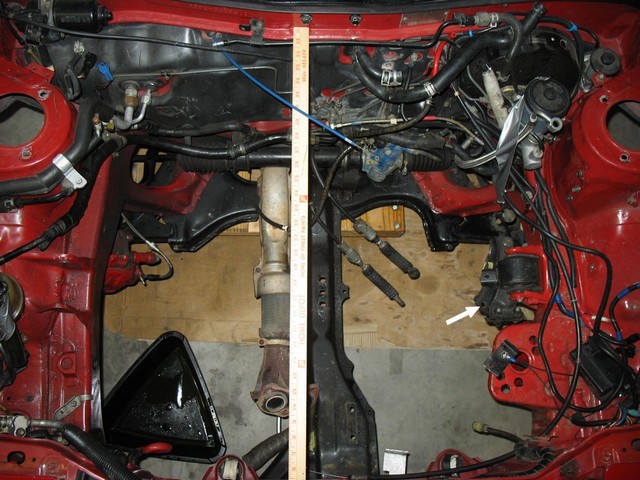
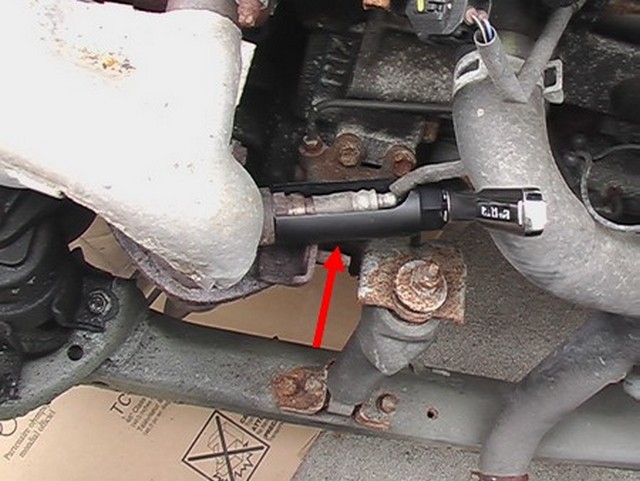
After making some more measurements, I was convinced the 1mzfe would fit. I'm sorry, but I did not record
those measurments. As I said, I will try to remember when the engine is out again. The ruler is positioned
where the engine is tightest. The white arrow is a hole that is common to the Corolla and Solara, so I used it
as a reference point when I took measurements.
As I see it, Toyota should have crammed a V6 in this car decades ago. I believe I heard that the Corolla is the best selling car of all time. Through all of its variations, they sold more that the model T, VW Beetle, the Ford Focus and Honda Civic. I don't know if that's true, but I do know, this was the coolest of all the Corollas and deserved the V6. So I guess I'll just have to do what Toyota didn't!
Next, I removed the engine from the Solara. If the car has air conditioning, I recommend having the refrigerant removed in an environmentally friendly manner before you begin. There is a lot of pressure in the system and it can hurt you if you just crack open the lines, too. I also highly recommend that you take lots of notes and photos and mark the wiring loom and bag the parts. This is what I do and I still wind up not knowing where stuff is or goes. But it helps a lot when you are putting things back together.
I recorded the whole process of remvoing the engine here. Not all of the steps need to be done in this order. In fact, I think some of them would have been better done in a different order. But this is what I did.
Step 1. Remove front right wheel.
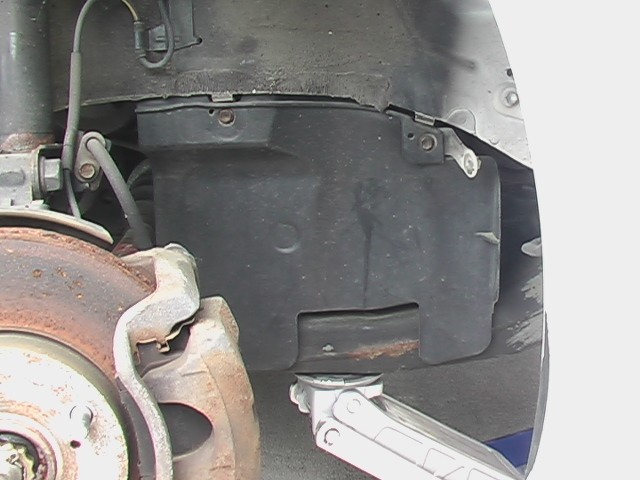
Step 2. Remove the right wheel well/cowl. (7 x 10mm screws, 3 x Phillips screws, 3 x clips) Here's where the trouble
started. It only took 2 steps. The cowl under the fender on the right side of the car is an integral part of
the wheel well and so wraps all the way around to the mud flap. The mud flap must be removed too. I counted 7 of the
10mm sheet metal screws that usually hold on the cowls of Toyotas, but toward the back of the wheel well, there were also
3 Phillips screws that secured it in place. These were a pain in the butt. I'm not even sure what the screws were for since the
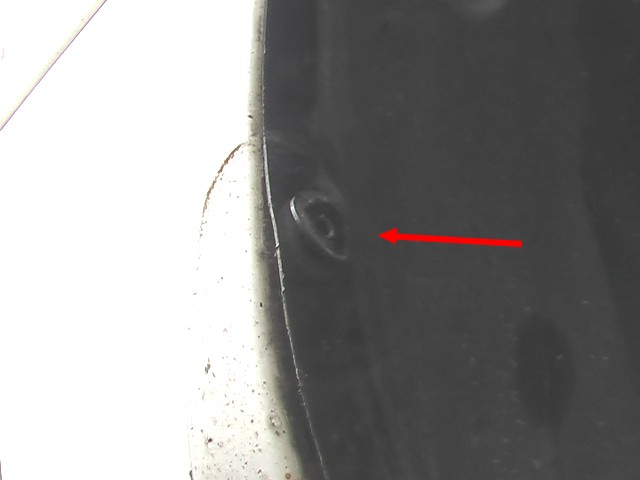
cowl was under the black clips they were screwed into and therefore still held nicely in place. These clips were
square in shape with two ears. To get them out, you have to squeeze the ears from behind and push the clip out
toward the front. But it is nearly impossible to A) get to the clips with the cowl in place. B) see which two
corners need to be squeezed. C) get lucky that the angle is right that you can actually squeeze the ears with
a pair of pliers and D) squeeze the corners and still push it out without your tool stopping the progress.
Warning: If you just brute force these, your cowl will break before the clips do and you will bend the body work!
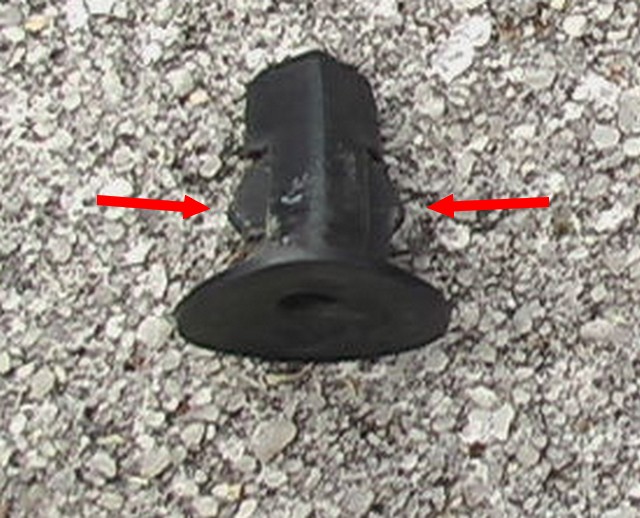
My recommendation is to cut them off and replace them later. Here's what they look like.
Step 3. Remove the right side plastic engine cover. (2 x 10mm bolts)
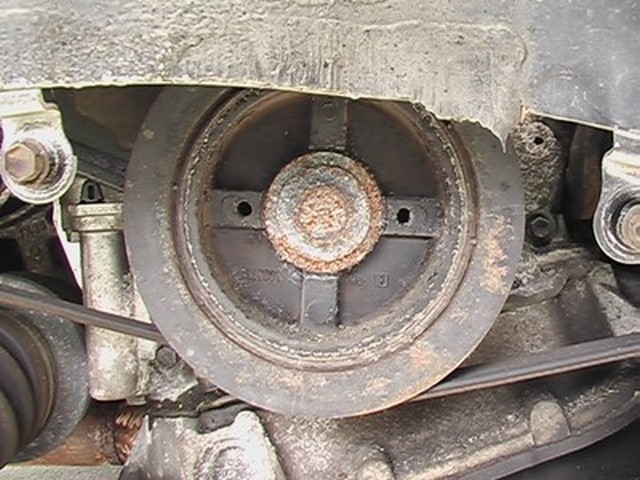
Step 4. Break the crankshaft bolt loose while it is on the car! (1 x 22mm bolt) When this engine is out of the car, I plan to replace the timing belt. But unless you have a way to really, really secure your engine out of the car, it will be nearly impossible to remove that bolt without your engine flopping around on the floor. I know it seems weird that you would need to hold down something that weighs about 400 lbs, but you do. And this bolt is very hard to get out even in the car.
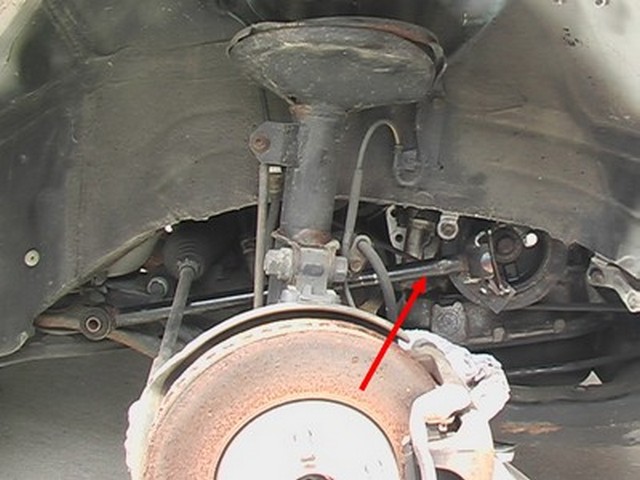
For me this turned out to be a walk in the park, because I had tackled it before in my wife's car. In the picture above you can see how corroded is the bolt. So I sprayed it with some of that penetrating oil first. Then I attached the RSST (Russell's Special Service Tool) to the crankshaft pulley. This is something I welded up to do the timing belt in my wife's car (red arrow). Then I used a very long breaker bar and still had to pull with nearly all of my might to break that thing loose. You don't have to remove the bolt. You just have to break it free.
You can see in this picture (red arrow) that I rested the tool on the drive shaft to keep the engine from spinning as I turned. You could try to use an impact gun, but when I used the most powerful impact wrench I could buy locally (700 ft-lbs), the bolt just laughed at me.
Step 5. Disconnect battery for a minimum of 90 seconds. (2 x 10mm nuts) This keeps the airbags from blowing during other work.
Step 6. Remove battery and charge it.
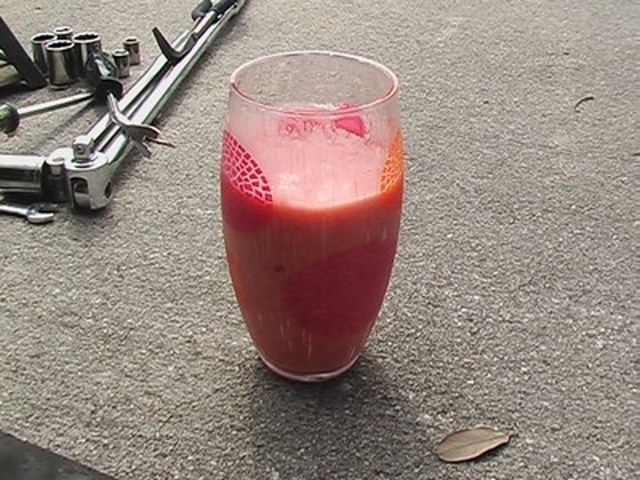
Step 7. Drink Smoothie.
This plastic cup is full of cracks and doesn't even hold water, but for some reason my wife insists on serving smoothies in it.
The smoothie is too thick to leak through. Hey, I'm not complaining. At least she's making me smoothies, right?
Step 8. Drain oil. This step may not be necessary. I just like to drain all of the fluids when pulling an engine.
Step 9. Drain gear oil. This step is necessary. To get the engine out with the transmission attached, the drive shafts must be removed. If you remove the drive shafts without draining the transmission fluid, it will pour out of the differential when the shafts are removed.
Step 10. Remove forward center engine cowl. The plastic drip pans under the front of the car. (7 x 10 mm screws)
Step 11. Drain coolant. If the radiator cap is loosened, the fluid will drain from the drain cock quicker.
Step 12. Remove radiator with fans. (2 x 12mm bolts, 3 x connectors)
These two connectors are on the left side of the car.
This one is on the right side of the car.
Step 13. Disconnect radiator overflow bottle hose at the engine and remove the bottle with the hose (1 x10mm bolt).
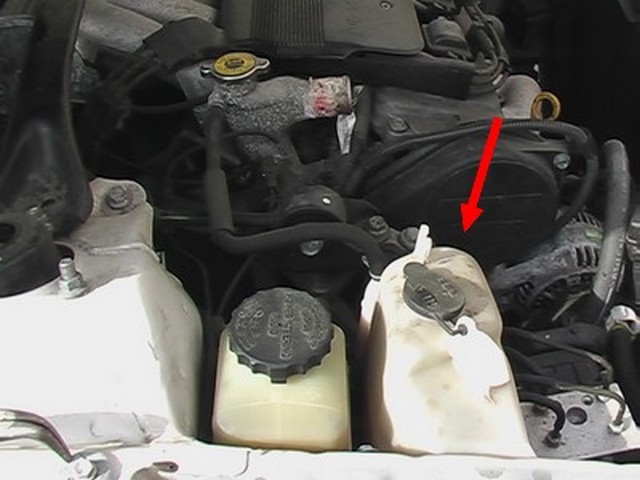
Step 14. Disconnect power steering hose on the pump to drain fluid. (1 hose clamp) Note: in this location the fluid will go all over the suspension and travel to multiple spots simultaneously causing a very large area of destruction beneath the car. Make sure to plan accordingly!
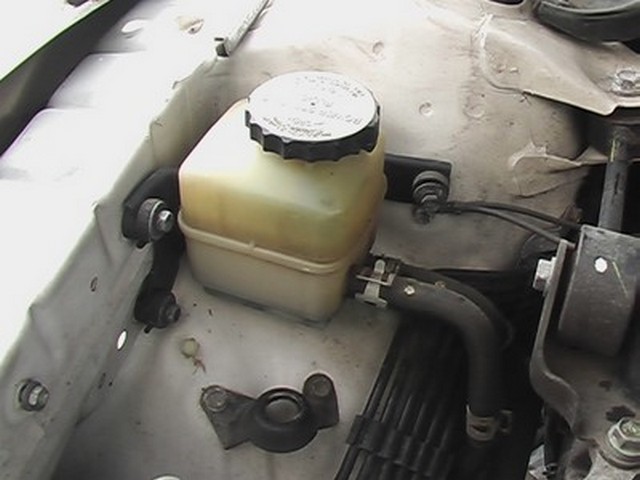
Step 15. Remove power steering fluid bottle, just to give you room to work. (3 x 10mm bolts)
Step 16. Remove freon from the AC system in an environmentally friendly manner if you haven't done this already. Note: Seal system and keep sealed until the last possible moment. moisture is the enemy of air conditioning systems. As I mentioned, earlier hopefully you have already done this step. I borrowed equipment from a friend to do this step.
Step 17. Disconnect O2 sensor from exhaust manifold. Note: There are 3 total oxygen sensors on the Solara The one on the top does not need to be removed if the exhaust manifold is left on the engine as it is removed. Instead it can be unplugged near the sensor itself. Also, to remove the O2 sensor it is best to use a special socket available from most normal auto parts stores. Here is a pic:
It allows you to turn the O2 sensor even though the wires come out the back.
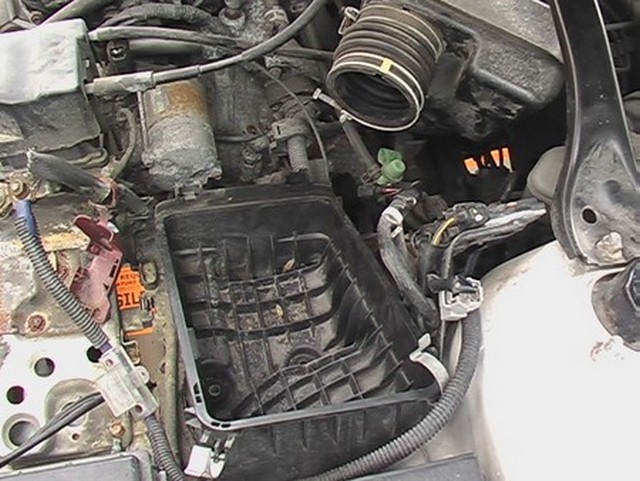
Step 18. Remove air intake box. (1 x 10mm hose clamp, Air Flow sensor, 2 x 10mm? bolts)
Step 19. Remove large intake hoses and funky air intake box from throttle body. (1 x 10mm hose clamp)
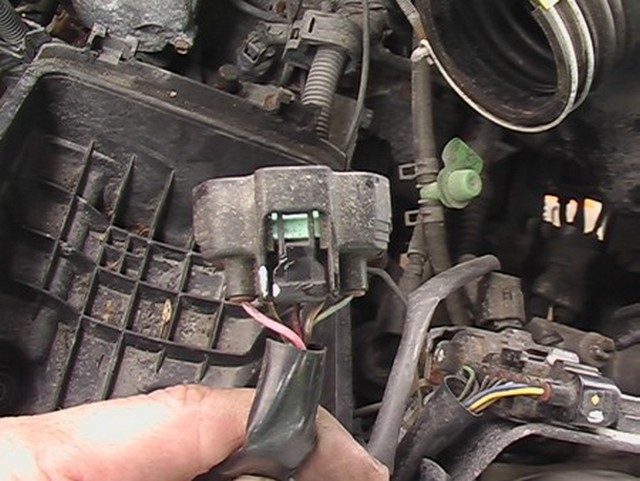
Note: The air flow sensor connector can be easily removed by using a pair of pliers to hold down the tab while a small screw driver is inserted between the two connector bodies and pried up. Here's a pic of what the air flow sensor connector looks like. It's attached to the air intake box assembly.
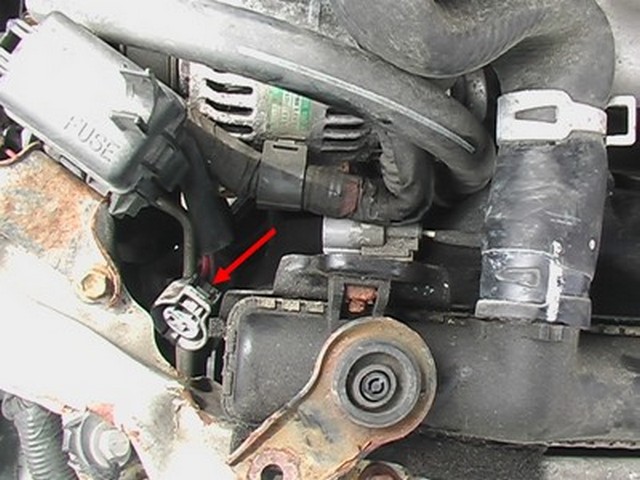
Step 20. Disconnect evap hose from the engine (1 x clamp). It's the one my finger is on in this picture. I recommend marking it so you know where it goes.
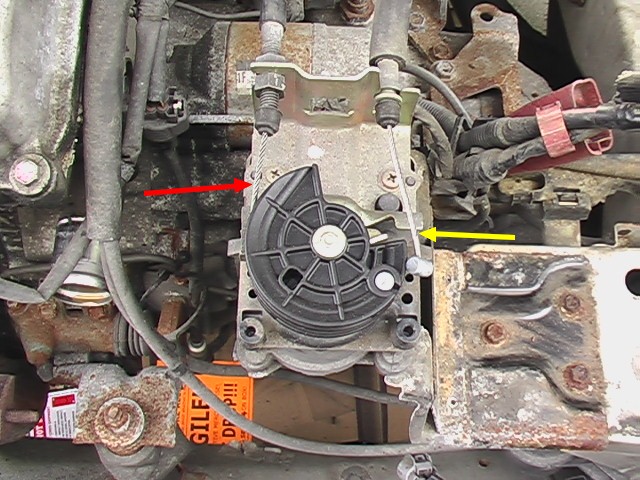
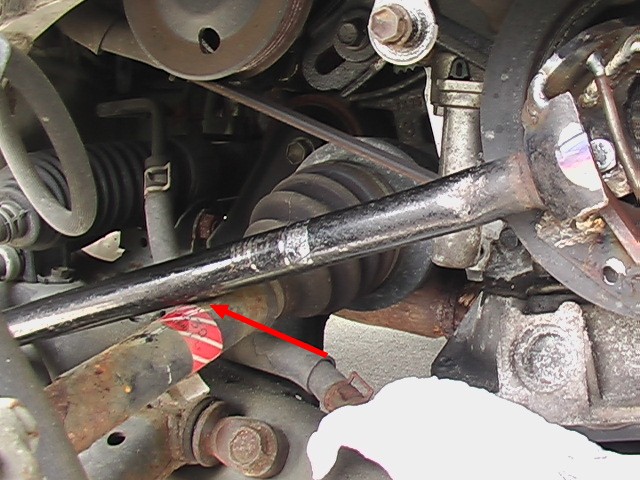
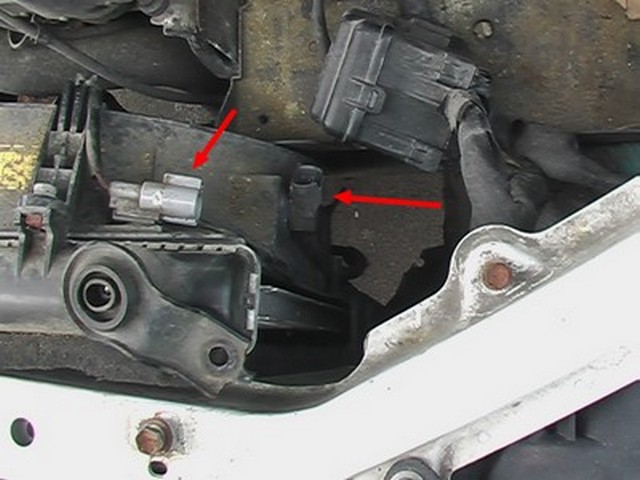
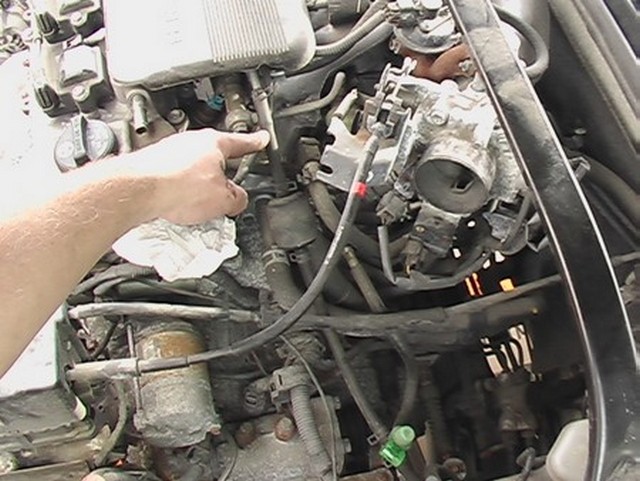
Step 21. Remove cruise control unit and cables (1 x cover, 2 x throttle cables, 1 x conn, 3 x 10mm bolts on bracket, 1 Phillips head screw on bottom throttle cable) Note: The top throttle cable (red arrow) goes to the firewall and the bottom one goes to the throttle body (yellow arrow).
Step 22. Remove evap canister doohicky from unibody frame rail on the right side. (2 x 10 mm bolts)
Step 23. Separate positive battery cables. On this car there were three cables that were all tied together at the positive battery terminal. The engine could not be removed unless these wires were separated.
Step 24. Disconnect starter wire. This is the one toward the front of the car.
Step 25. Disconnect ground on transmission. (1 x 12mm? bolt) This ground is on the transmission, just below the starter. It runs to the negative battery terminal.
Step 26. Remove igniter and other things attached to that bracket. (2 x 10mm bolts) This bracket is attached to the left hand strut tower.
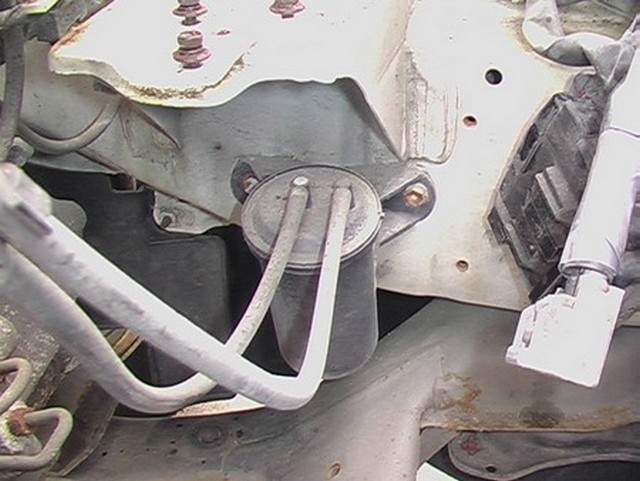
Step 27. Remove fuel filter. (2 x 10mm bolts and two hoses) Note: to keep fumes from escaping, you may want to do this step later or just plug the holes.
Step 28. Go in and have something to eat! Remember breaks are important!
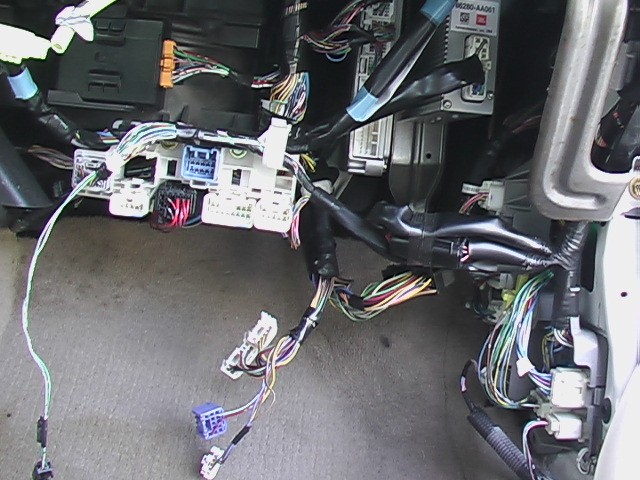
Step 29. Disconnect all wires that go through the firewall that connect into the ECU and white junction box under the right hand dashboard. I will leave the steps for getting the panels off to expose this to the reader, but here's a picture of the connections I removed. This was easy.
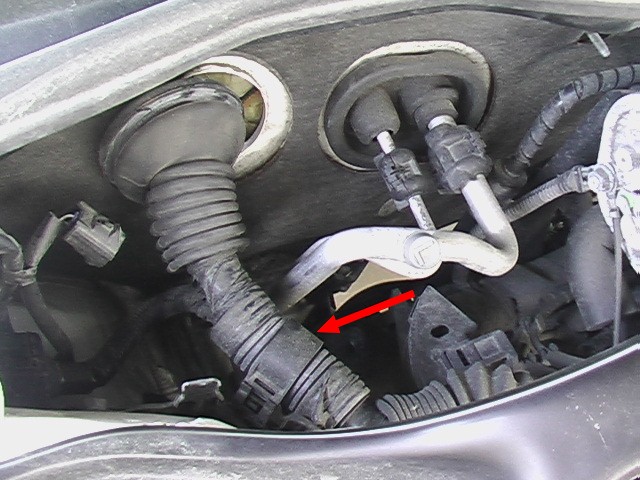
Step 30. Pull wires through firewall. This is difficult if you don't release the wires from where they are secured to the strut tower. There is a plastic clamp that sits on a support on the strut tower and a little tab must be pushed to release it and it then lifts off easily. Here's what it looks like.
Step 31. Remove strut tower bar (4 x 14mm nuts, 6 if you also want to remove the struts, which I did not do).
Step 32. Crack transmission bolts. This step is not necessary, but I thought it would make it easier to separate the transmission from the engine later. There's no way I'm taking the engine out of the car and not taking the opportunity to do the clutch, no matter how new it might be.
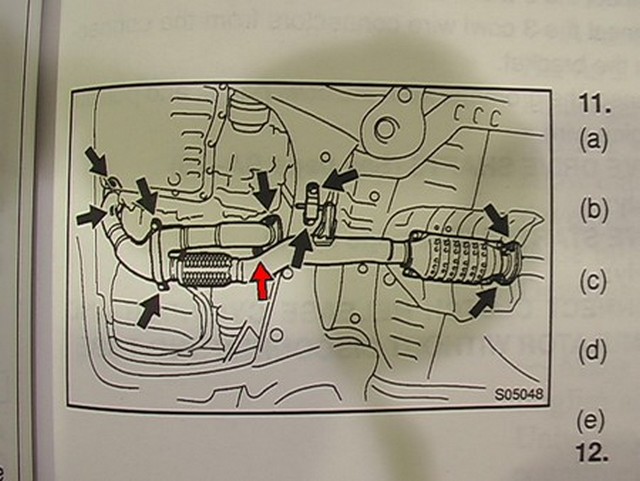
Step 33. Unbolt exhaust. Yeah right! Hey if you can do this, be my guest. Fortunately I don't expect to use this exhaust, so I just cut it off with a saws-all. Here's what it looks like under there though.
As you can see in order to get the engine out, you would have to remove the front exhaust manifold and the rear exhaust manifold
all the way back to the catalytic converter. That's a lot of heat rusted bolts to successfully remove. I cut mine at the red arrow
instead.
Step 34. Disconnect two coolant hoses from firewall. I removed these at the engine. The top hose on the firewall goes to the bottom-most connection on the engine and vice versa.
Step 35. Disconnect shift linkages on transmission. ( 2 cotter pins, 2 washers, 2 clips)
Step 36. Disconnect alternator electrical connections. (1 x 10mm nut, 1 x connector)
Step 37. Disconnect AC compressor wire. (1 x connector) It's on the same harness as the alternator.
Step 38. Disconnect 2 ground wires from right hand strut tower. ( 2 x connector)
Step 39. Disconnect brake booster hose from intake (1 hose clamp)
Step 40. Disconnect clutch hydraulic line, either at the firewall or at the transmission. (1 x clip, 1 x 10mm)
Note: I roughly followed the procedure in the manual, which was not a very good guide and at this point the drive shafts should come out. However, due to the design of Toyota drive shafts, this became very problematic. I'll explain.
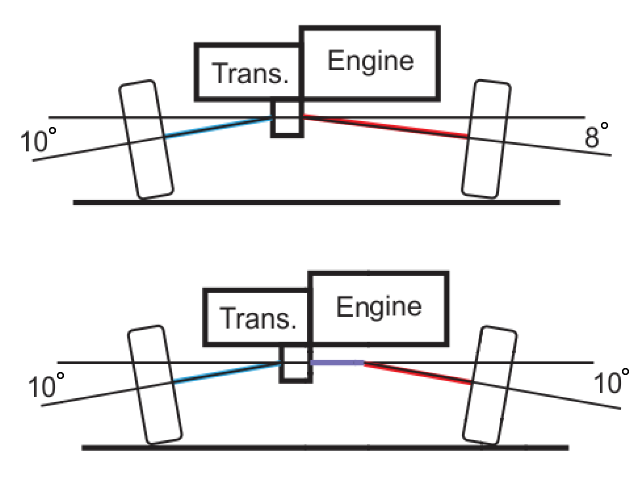
Torque steer is a change in the direction of the front wheels due to a change in throttle. This steering pollution is caused by the difference in angle two unequal length drives shafts experience as the car squats (and front wheels lift) under acceleration on a front wheel drive car. With the engine on one side of the car and the transmission on the other side of the car it is difficult to make these shafts equal in length. To combat this Toyota uses a two part shaft to cover the longer distance. The inboard portion of the longer shaft is straight and does not change angle with changes in suspension travel. See drawing.
It is captured on it's inboard end by the differential and on it's outboard end by a special bearing that mounts to the engine block which also functions as a motor mount. The outboard portion of the overall driveshaft is equal in length to the one on the other side of the car and therefore experiences the same angular displacement. No torque steer. However, this arrangement causes problems getting the shaft out of the car.
At the time I orignally wrote this, I had not figured out how to separate the two different parts of the long shaft or slide the entire shaft out of the car while leaving behind this bearing. I therefore removed the bearing with the shaft as a unit. However, this bearing is much larger on the Solara than on the Corolla and was much more difficult to get out. The Toyota manual doesn't even mention this bracket, in the drive shaft section. Since then, I have found a youTube video which explains how to slide the shaft out of the bearing.
This one destroys the shaft:
http://www.youtube.com/watch?v=TAX4K1Btt0oI can no longer find the video that just removes it without ruining it.
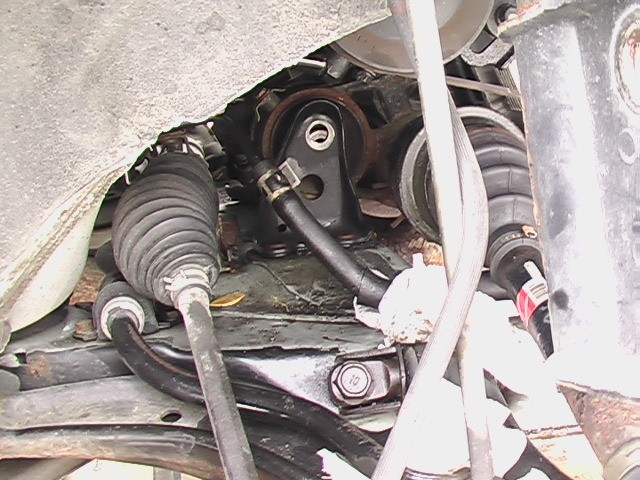
So to remove the passenger side drive shaft in one piece, you have to remove the clip that goes around the bearing. Then loosen the bolt that secures the bearing from the bottom. I find that this bolt often doesn't really do anything. There is a little rubber tip on the bolt that gets flattened and no longer really holds anything, but just in case, it should be removed or at least backed out a bit. Then (after you've removed all of the brakes and suspension on the outboard end of the shaft) find a way to pound the shaft out. It will be very hard but it will come out. One of the ways this can be done is to remove the driver's side shaft and then stick a drift (long metal round punch) into the differential against the interior end of the passenger shaft. This can be dangerous for two reasons. One, if you are not careful you could be pounding on the inside of the differential instead of the shaft and two some differentials don't provide access to the end of the passenger shaft. I think some limited slip differentials actually have a bar going through the middle which can block access to the end of the shaft. In my case, this worked fine. The advantage to doing it this way is that the shaft was driven straight out. If you try to pound the shaft out by hammering on the inboard CV joint or prying it with a prybar, the shaft is coming out, but it is also angling a bit and can bind up, making things even harder. Good luck with this one.
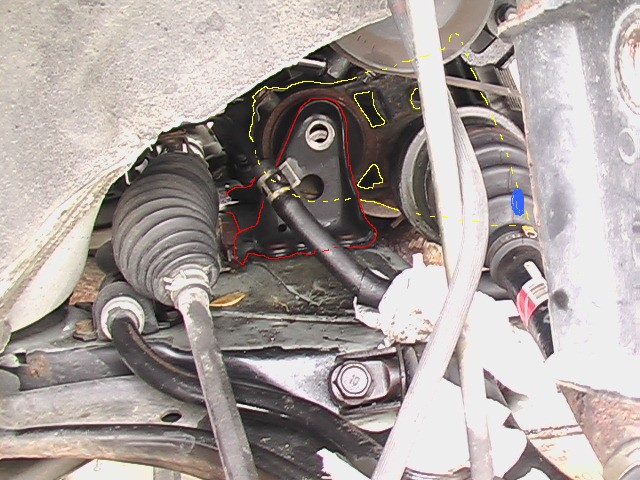
It's difficult to see from the previous picture, so I will highlight the parts I'm talking about.
Step 41. Remove the bolt that secures the bearing/motor mount to the body motor mount on the bottom rear. (1 x 17mm bolt)
Step 42. Remove 4 nuts from underneath the body motor mount. (4 x 14 mm) Note, there may be covers over the holes, hiding the nuts.
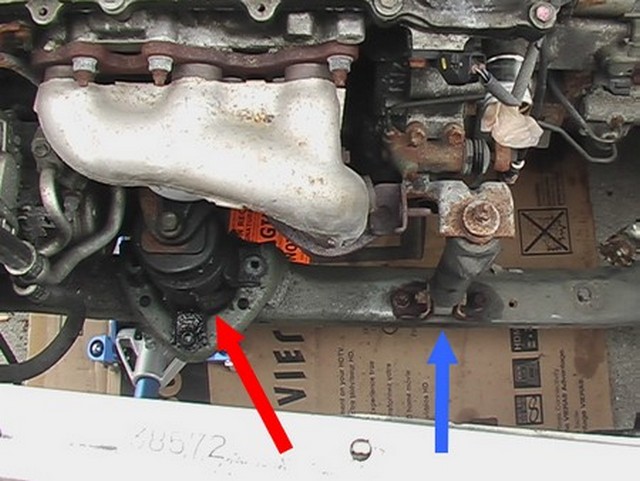
Step 43. Loosen/remove the bolts that secure the front engine shock to the bottom frame (2 x 14mm) (blue arrow)
Step 44. Remove bolts that secure the front right motor mount from the bottom frame. (3 x 15mm, 1 from underneath, 2 from on top) (red arrow)
Step 45. Remove underside transmission mounts. (4 x 14mm bolts or 2 x 14mm nuts depending on where you separate it from, 2 covers)

Step 46. Remove dog bone. You'll notice I marked how it goes in.
Step 47. Remove body motor mount. Jack engine up to clear.
Step 48. Remove left hand drive shaft (if you haven't already). I use a regular claw hammer to do this, but it's hard. I use gloves to protect my hands when it gives way. Good luck. It feels like it doesn't want to come out. Some people say that the suction that is created by removing these shafts can be relieved by opening the transmission fluid drain hole. I have never done this, but it makes sense.
Step 49. If you haven't done this already as discussed above) Making sure all of the bolts securing the right hand bearing to the engine are removed and the bearing has been separated from the engine enough for the alignment pin to be out of it's hole, use a drift or some strong and long thing to knock the right hand drive shaft out from the left hand side. Warning: the diameter of the hole that goes all the way through the differential, giving you access to the drive shaft on the opposite side is not very big (less than half an inch). If what you use is too large, you will be pounding on the internals of the differential. This is not good!
Step 50. Disconnect AC lines on the compressor. Warning: there will probably be some residual pressure in the system which will force freon into your face. Be careful!
Step 51. Disconnect fuel filter. (1 x 14mm if removed from bottom)
Step 52. Disconnect wires that are attached to the fuel filter bracket.
Step 53. Attach front lift hook to head toward the front of the car. The Solara only comes with one lift hook attached at the back of the engine behind the intake manifold. The other one must be purchased from Toyota. I used one off of my 4agze motor and although it was a different style, it worked fine.
Step 54. Remove hood (6 x 12mm bolts)
Step 55. Remove power steering line at back of engine. I believe it sits on top of the power steering rack. I missed this and had to detach it after I had lifted it about 2 feet out of the car, bending it quite a bit. (2 x 10 mm, 1 x connector)
Step 56. Remove engine.
Step 57. Smile and have a beer or your drink of choice!