
Interior
Pedals
October 20, 2010

It was time to rid myself of those old tired rubber pedals in the Corolla. They served me well and lasted a long time, but after seeing the ones that came in the Spyder, I felt they were the best I had seen. And being Toyota, two of them fit directly on the pedal assemblies in my car. They look like the ones to the left.
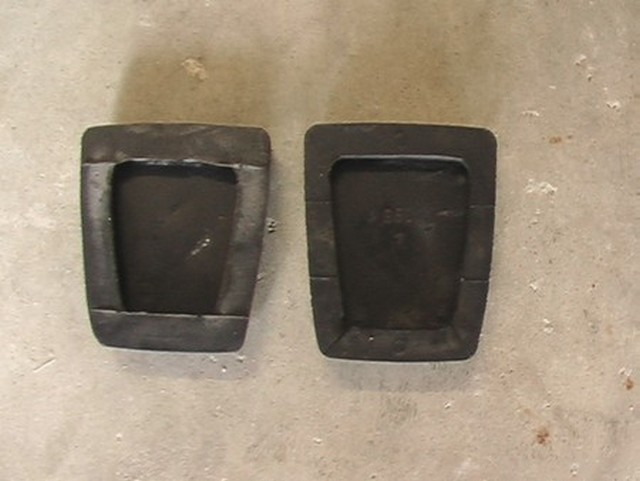
Here's what they look like from the back. They literally just slip on.
The one that didn't fit was the throttle pedal. I did manage to get it to work, but it took some more effort since the throttle pedal assemblies of the two cars were not the same.
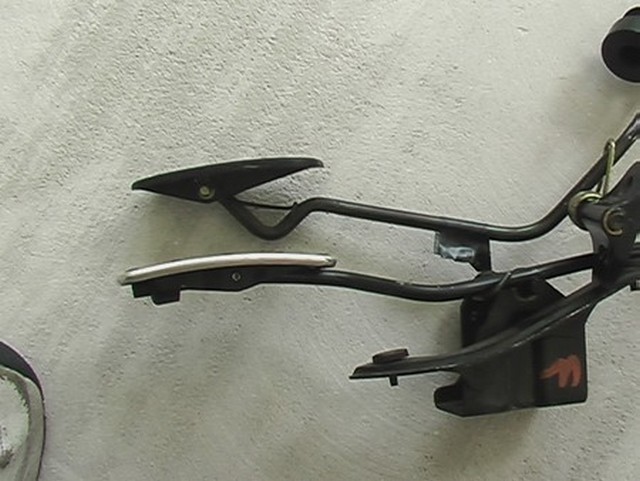
The design of the MR2 pedal and the Corolla pedal were a little different. You can see some of the differences here.
The Corolla pedal, on top, has a little swoosh in the end that allows the pedal to float a little. The MR2 pedal on the bottom is fixed to its metal arm. The MR2 arm was totally different from the Corolla arm, so I couldn't easily use it.
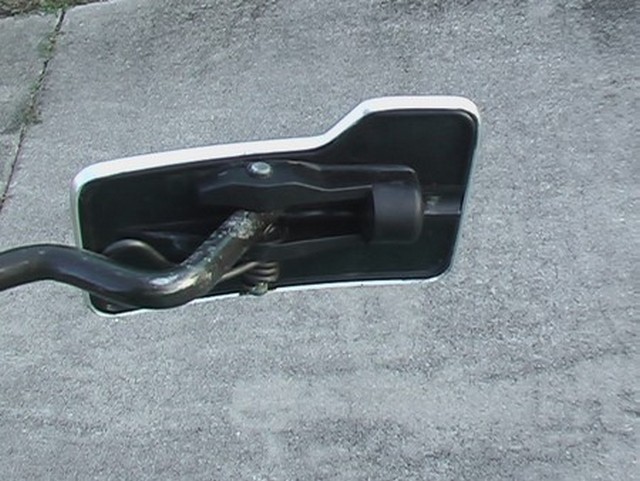
Unfortunately, I forgot to take pictures of the backs of both pedals for a 'before' shot. But here is a picture of the back of the hybrid pedal.
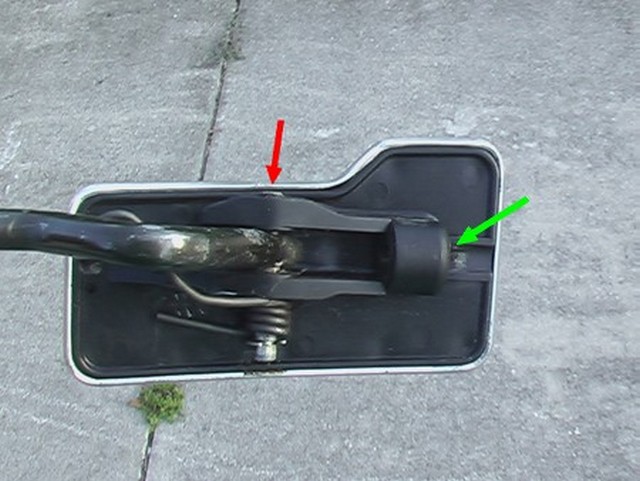
I had to cut a little bit off of the Corolla arm so that the hole in the arm where the pin fits through would line up. There is a C-clip that holds the spring on the pin at the bottom, but at the moment there is nothing holding the pin in at the red arrow except for a very tight fit. I think I will drill a little hole through the plastic and into the arm, then drive a pin into it to keep it from coming out and leaving my throttle pedal on the floor while I push on the arm with my foot.
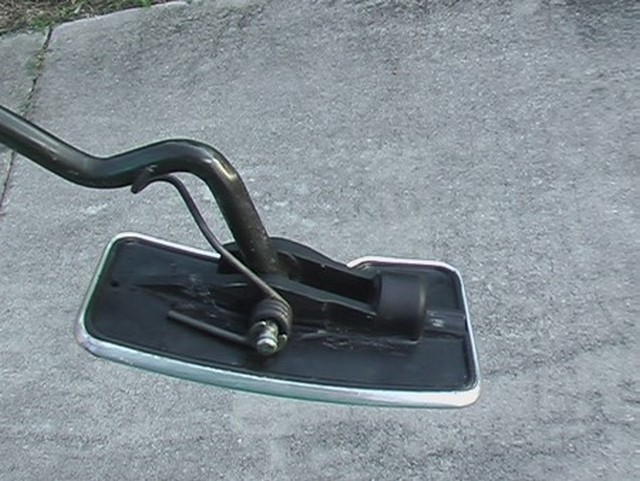
Another way to do it would be to fix mount the pedal to the arm, much like the MR2 design. I could have welded a rod of the same diameter as the arm, to the end of the arm and slipped it through the loop on the bottom of the pedal (green arrow). If I don't like the floating feel of the pedal, that the Corolla came with, I might still do this. I simply don't recall any difference while driving between toe-healing the Corolla and toe-healing the MR2.
Here are a couple shots of the back
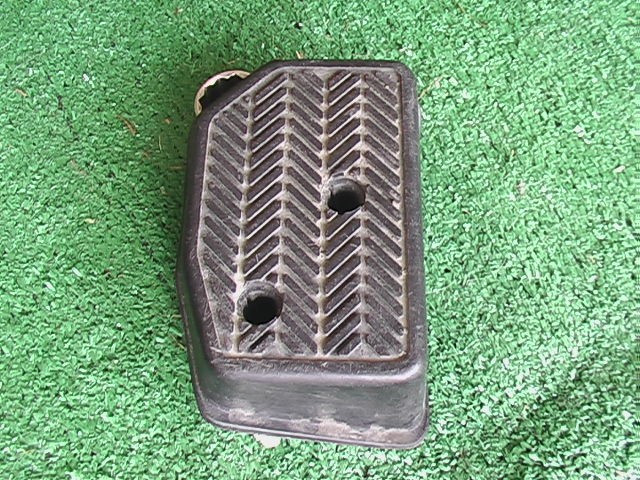
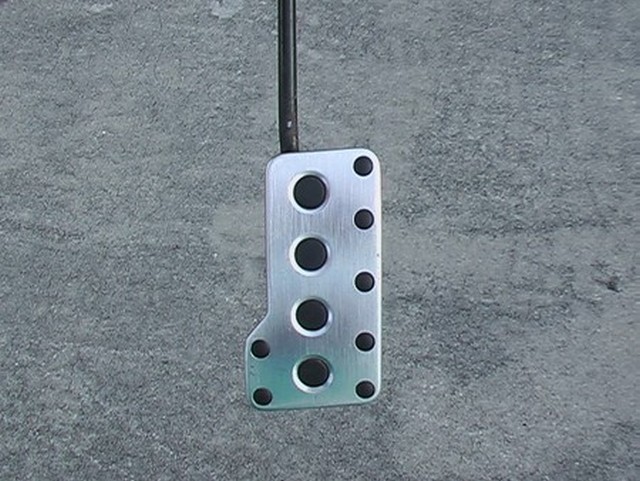
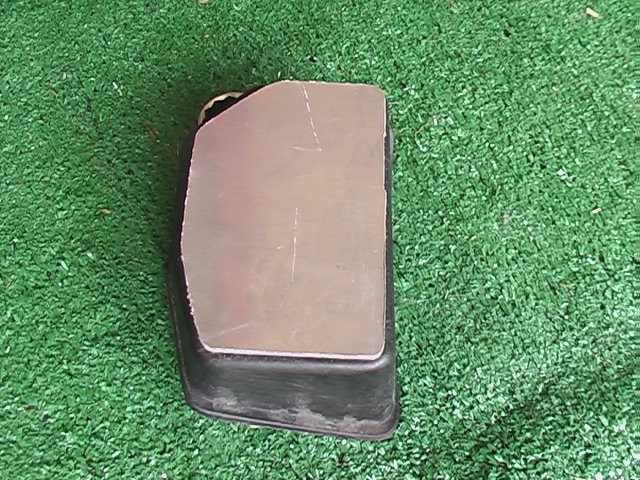
Finally, there is the dead pedal. The dead pedal from the MR2 Spyder wasn't the right shape for the Corolla. Plus it looked different than even the other Spyder pedals, so I decided to make my own aluminum top for the Corolla dead pedal. Here is what the Corolla dead pedal looked like.
I took a piece of scrap aluminum and cut it to the size and shape of the corolla dead pedal. When you do this it's important to find a piece that doesn't have deep scratches in it. This was the best piece I had.
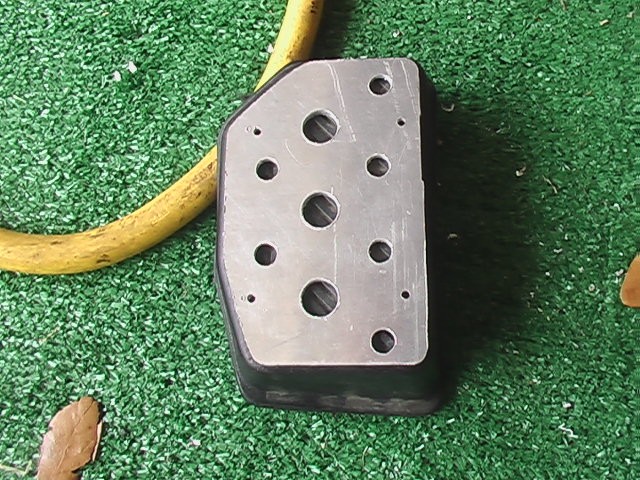
I used a ruler and laid out a pattern similar to the Spyder's gas pedal and drilled the holes. The holes were a little ragged around the edges, so I first used a ridge reamer (a device for deburring holes also called a deburring tool) followed by some sand paper, until they were uniform. If you look closely the finished product does not look like it was machined, but it's very close and it won't take long putting my foot on the thing before it gets scratched up anyway.
The four small holes have to be placed carefully. They hold the aluminum to the plastic, so you have to know what is on the back side. If you use self tapping screws, it helps if there is a lot of plastic there and if you use a nut to hold it on, you have to make sure there ISN'T any plastic ribbing there.
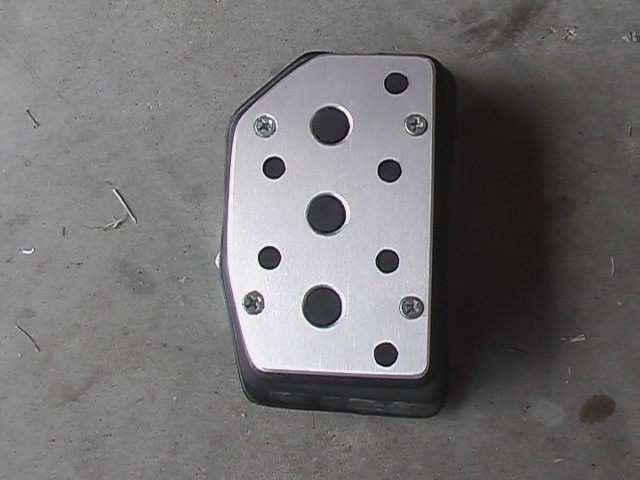
After that, I took the part to work and placed it face down on a belt sander. I had read on the internet that you can create a brushed finish if you find a guide of some sort to keep your sanding block steady as you sand it carefully back and forth in a perfectly straight line. I figured holding the part on a belt sander would be the same and it came out perfect. I had to sand long enough to go deeper than the scratches that were in the base material, but other than that it was really easy and really fast. I tidied up the edges while I was there. I did that freehand with the belt sander and it wasn't too hard. You just have to hold the angle steady. I love the finish.
Then I countersunk the holes for the screws that I used to attach it to the plastic. I figure my feet will be wet pretty often when I get in the car, so I used stainless steel hardware.
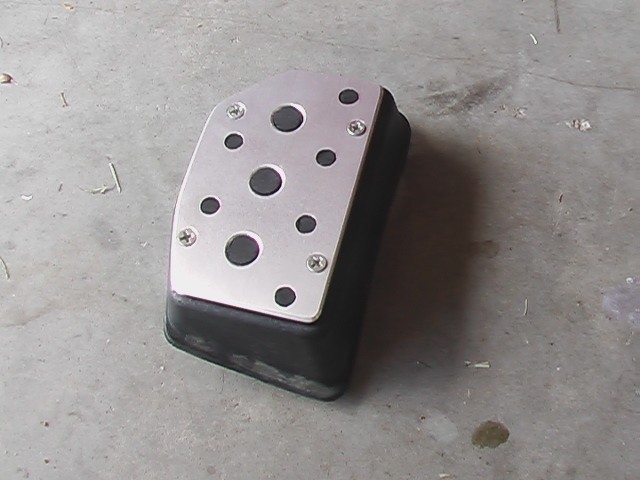
But I wasn't done. You could stop there and Toyota did with the Spyder dead pedal, which doesn't look that great. Instead, I took some thick black rubber and traced the hole pattern onto it. Then I took an Exacto blade (kind of like a small utility knife) and cut away at the rubber, leaving only the round parts that fit up through the holes. This was a major pain in the butte'. Fortunately, it didn't have to be perfect because the aluminum would compress the rubber. So I just had to remove material to more or less the same depth.
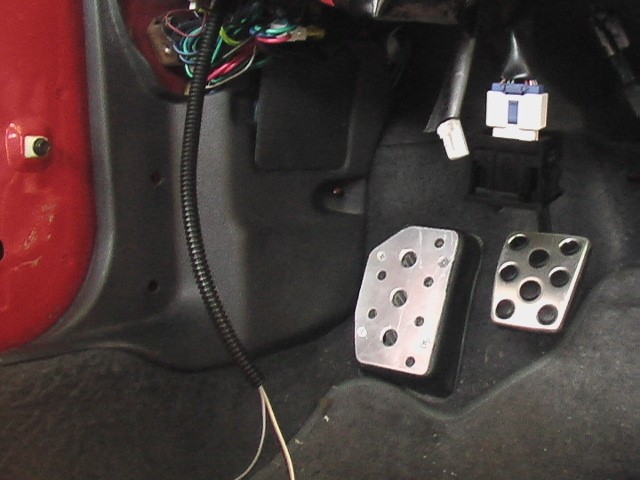
And here it is in the car. I think it looks brilliant. I guess I'm really happy with it, because I didn't think I could make it look so good. It was a rare pleasant surprise. I just looked at the picture and saw that it was before I put the finishing touches on. Oh well, I'll take another picture later. It still gives you the idea. The only problem is that it has to go on and off in pieces. To remove it, I would have to remove the aluminum and then the plastic. I don't think that's a big deal, though since it isn't really ever removed, once the carpet is replaced.
While I'm discussing the pedals here's a good tip. After doing my 4agze swap, the car would frequently fail to start. It was very annoying and I kept thinking it had something to do with how hot the engine was or a bad connection from the ignition switch to the starter motor. I didn't figure out the problem until I started doing the V6 swap and I found it on accident. It's a shame but that issue was one of the reasons I was so sour on the 4agze swap.
When I tried to start the donor Solara it seemed to have the same problem. Once, when it wouldn't start, out of anger, I just started yanking on the steering wheel while I turned the key. Kind of like a gorilla would start a car. Kind of funny in retrospect. Well while I was moving around in there, the car started and I noticed that I had also moved my foot on the clutch pedal. That told me that it had a bad clutch start switch. Since I intended to use that switch, I wanted to make sure it was operating properly. So I removed the switch, put a multimeter on it and it worked fine. I repeatedly pressed it in and out and it worked fine every time. Then somehow I had the brilliant idea to apply a little side force to the switch as I pressed it in. When you press on the clutch pedal, it doesn't press directly on the end of the clutch start switch, it slides across it a little as the pedal goes through its range of motion. When I pressed sideways and in at the same time, the multimeter showed that it DIDN'T work. Ha! Sure enough, the Corolla clutch switch had the same problem.
That was a very hard problem to find. So if you ever suspect your clutch start switch is bad, don't just press it in when you test it. Give it a little side force too.

Here's where the clutch start switch goes on the Corolla (green arrow).
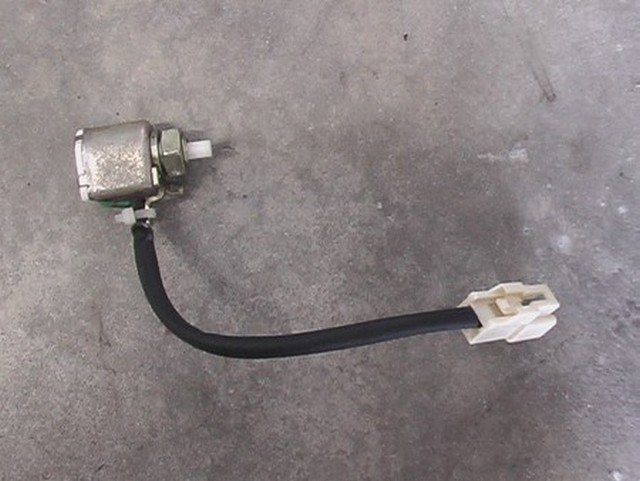
And here's the offensive little part.
If you are a little shy on cash, you CAN repair these. One time, when I had no choice I took the brake switch apart on my wife's car, because the brake lights were constantly on. I knew the switch was broken, so I didn't have anything to lose by opening it up.