
Mechanical
Engine Swap
May 16, 2010
A lot of preparation went into the project before the engine was swapped into the Corolla. You can read about that in the Chronicles section of this website. Many of the details of this swap are discussed elsewhere. This section will remain a little more general.
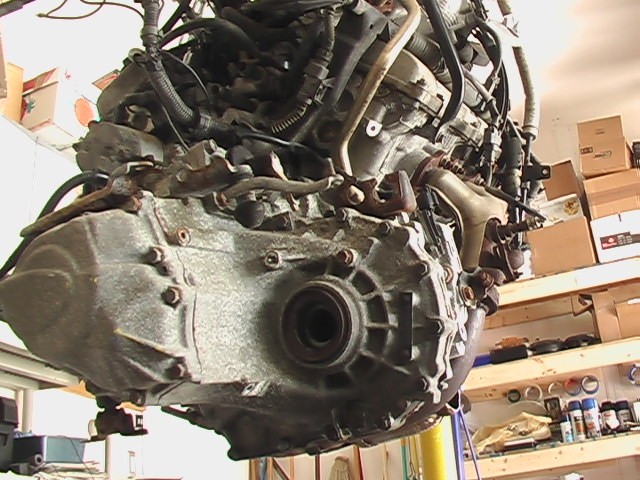
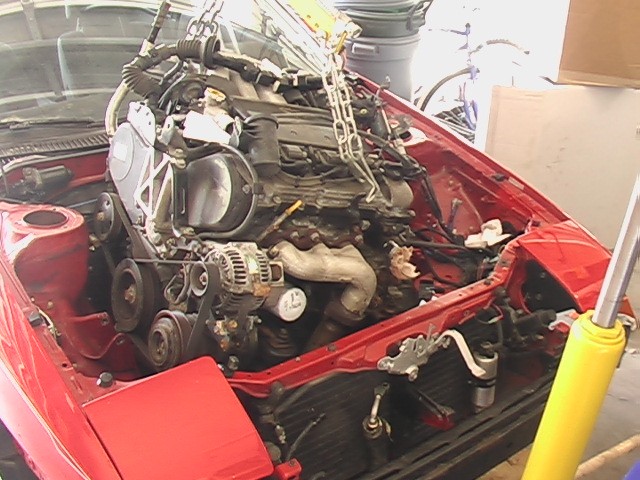
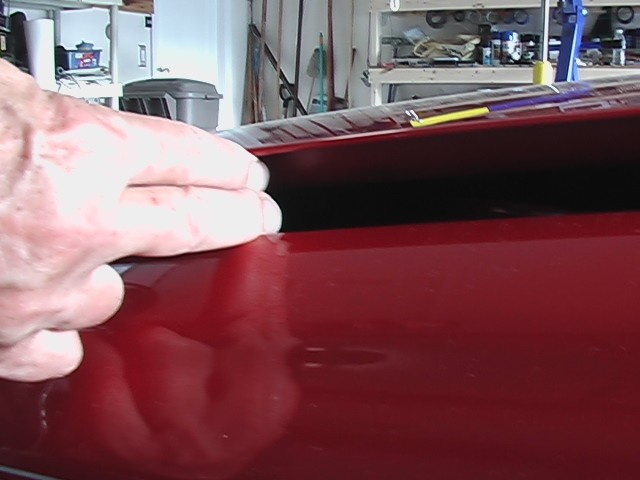
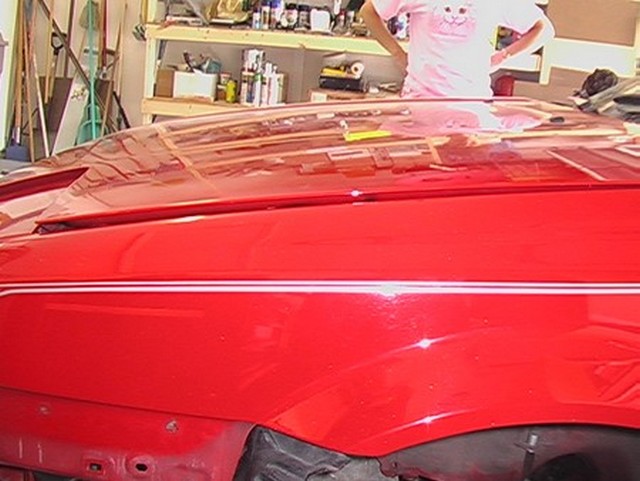
At this point, I have already removed both engines, but before I began test fitting the V6 into the Corolla, I decided to take some pictures.

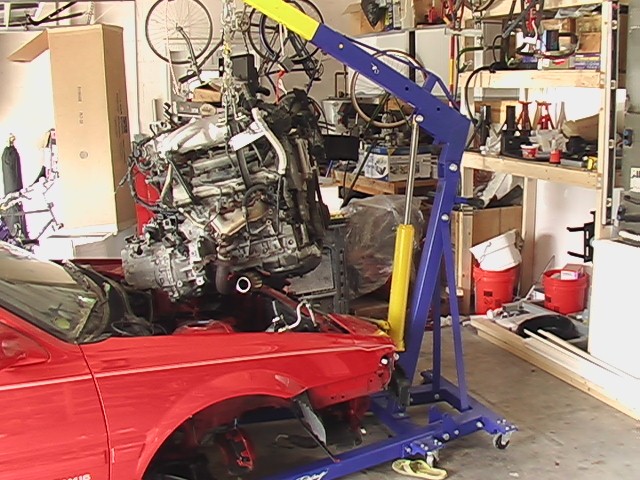
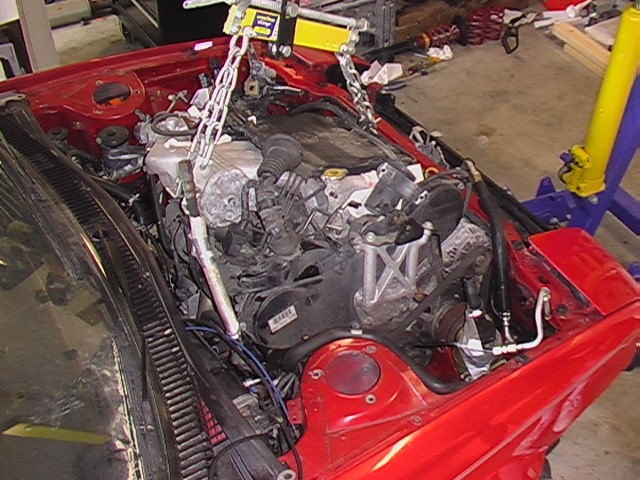
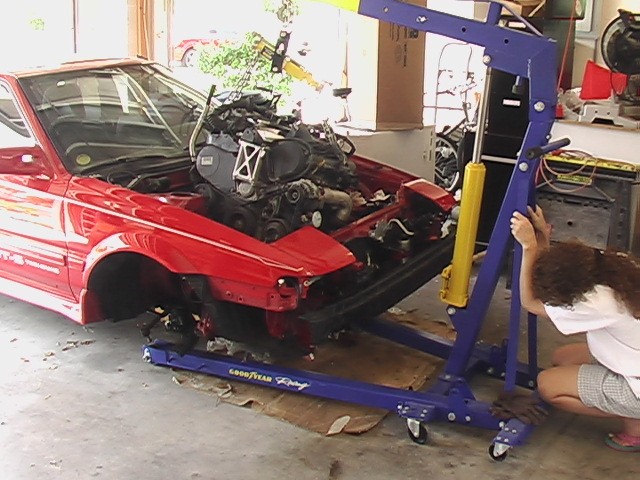
And here is the fateful moment. I always get a little nervous when the engine is hovering over the car like this. If the hoist failed at this point, it would likely damage both the car and the engine.
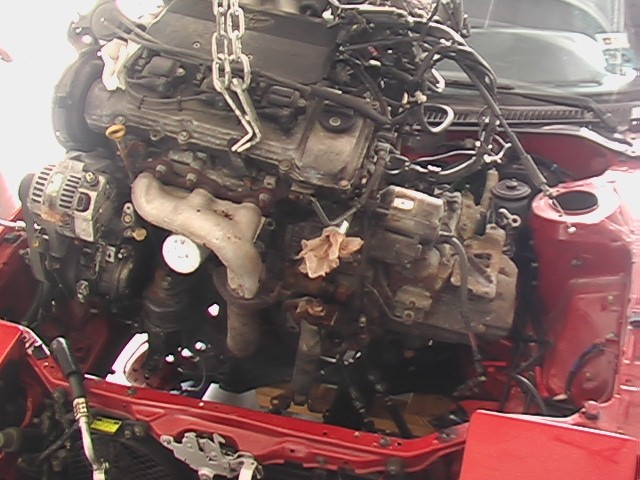
At first it was looking like I would have to separate the transmission from the engine to get it in, but surprisingly as I lowered it in, with the gracious help of my neighbor, it started to clear all obstacles. Well, not ALL obstacles. I had to remove several parts to get it to slide down. Here it is descending into the Corolla engine bay.
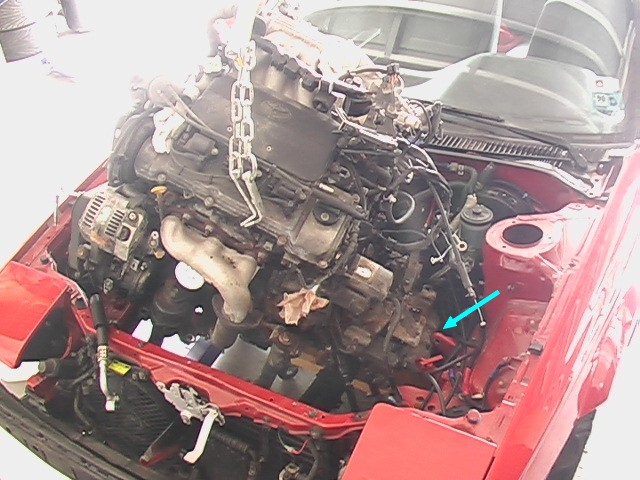
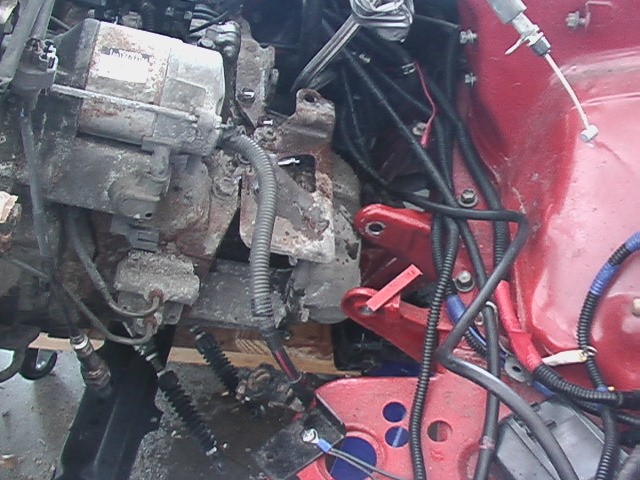
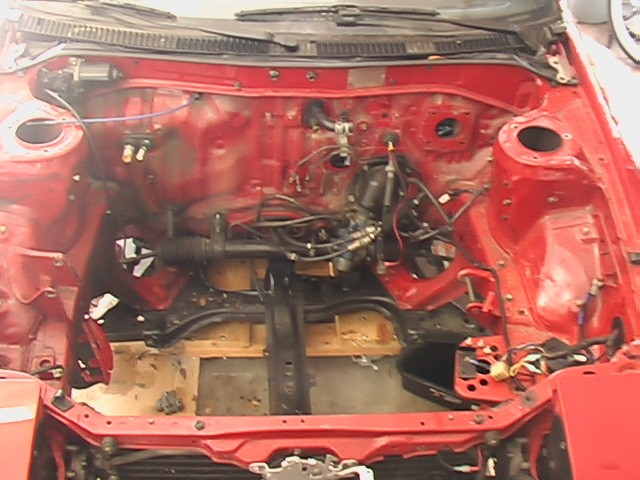
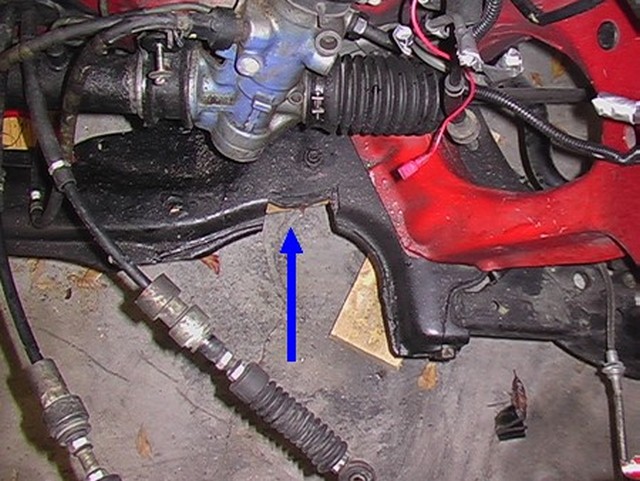
To get it in, you have to get the transmission under the transmission mount in the car (blue arrow).
Here's a closer look.
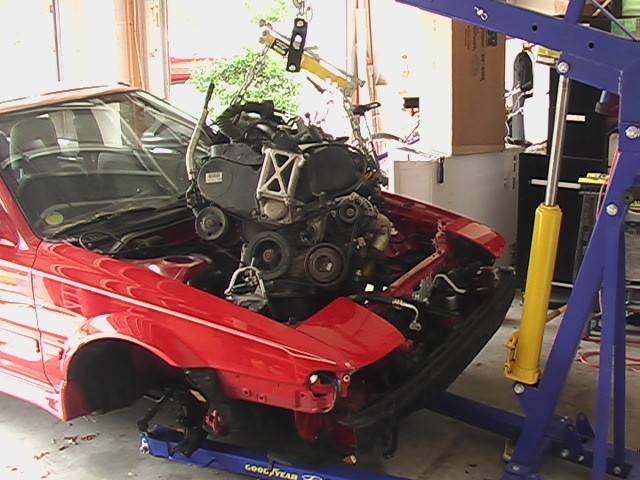
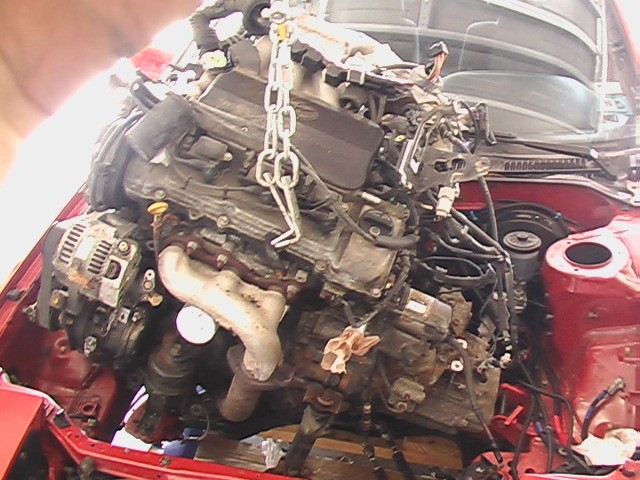
This shot always astounds me. Look at the size of the motor and look at the size of the car. There's just no way that thing is going in there.

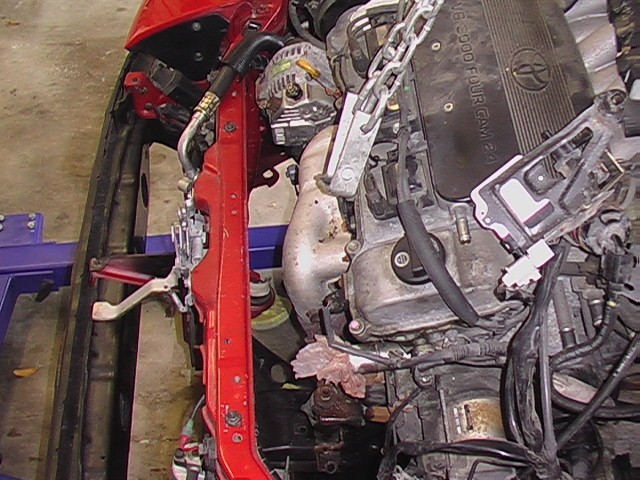
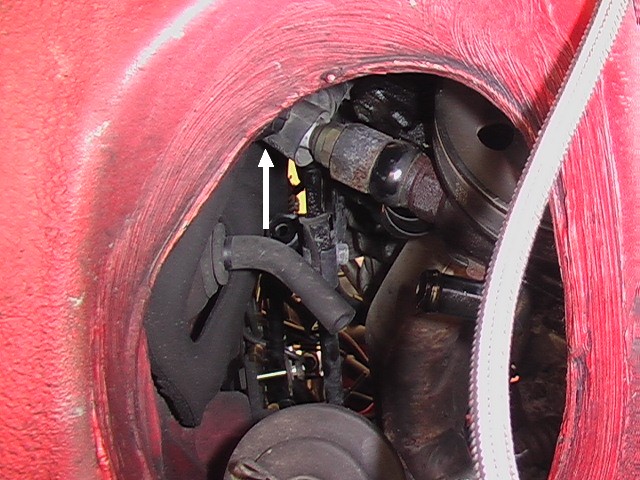
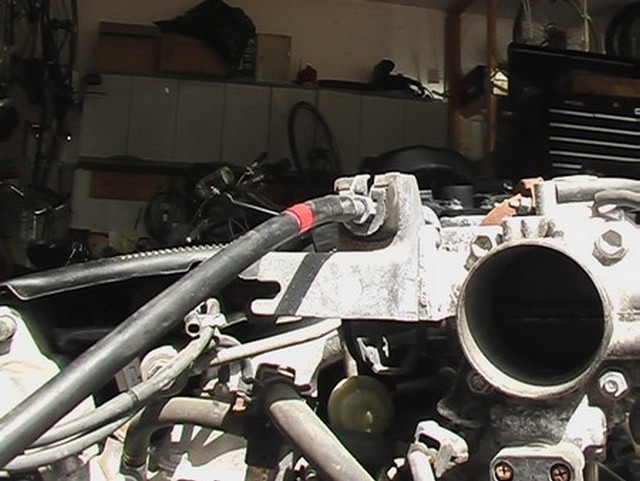
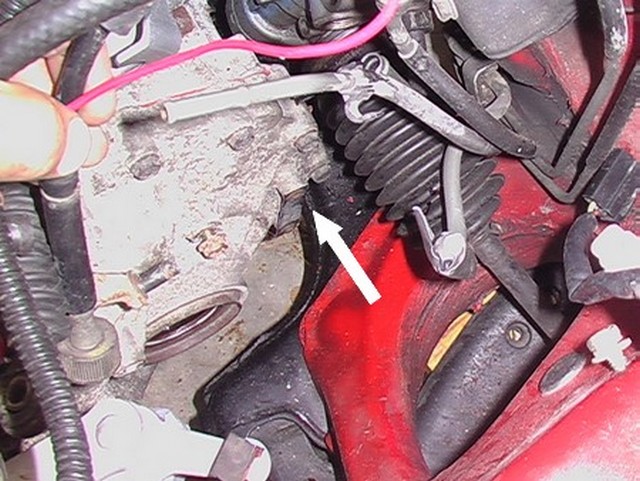
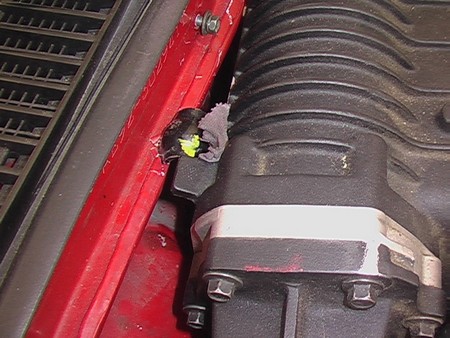
At first it looked like it wouldn't fit. The green arrow points toward the rear exhaust manifold. The blue arrow points toward the power steering pump hose and the red arrow points to where the two interfere. However, this stopped being a problem when I got further down the road. There were bigger problems with the fit of the engine than this.
Here's another picture from further away.
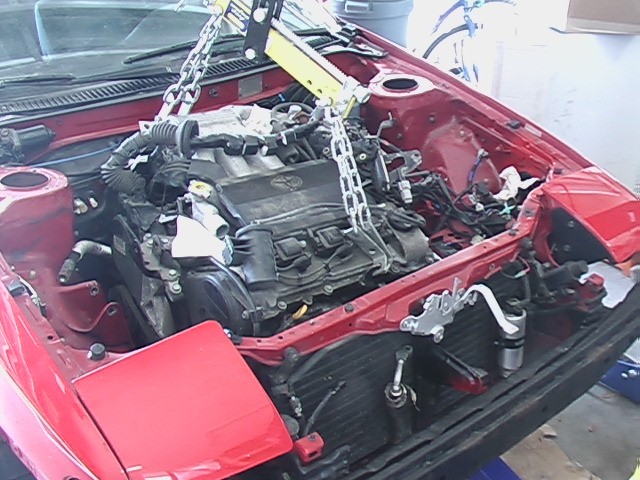
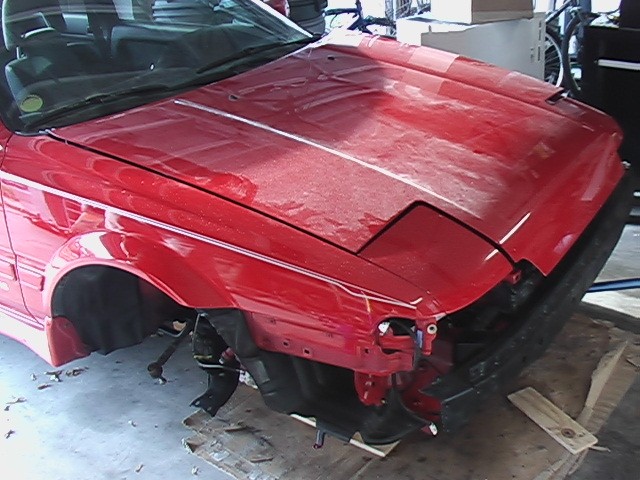
Here's what it looked like at the front. But again, I wasn't finished. This was just the first try.
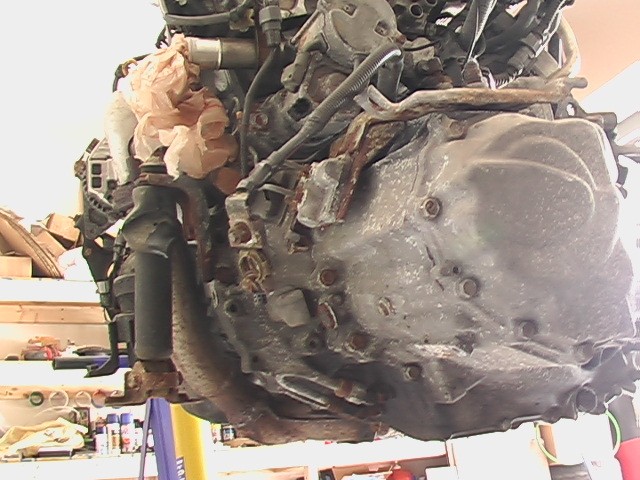
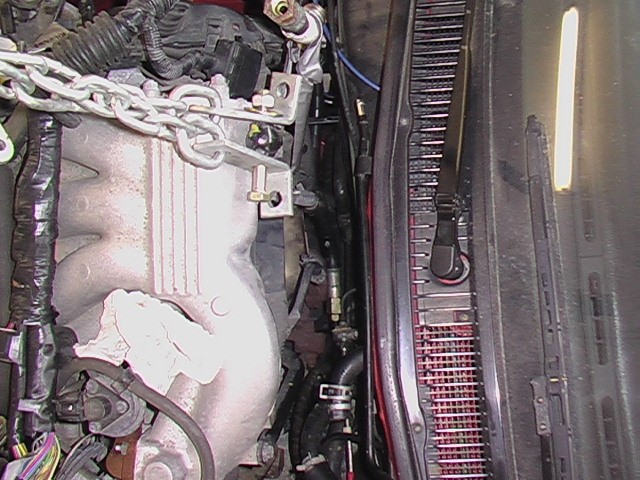
This is as far as the engine went in. The exhaust was resting on the bottom engine support: The one that runs the length of the Corolla.
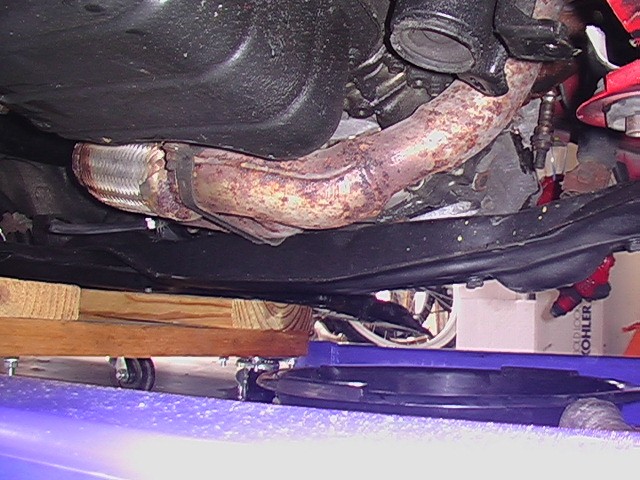
You can see the rusty exhaust sitting on the black support.
This was my second try. I removed the lower support and some other items that got in the way and things went a lot better.
And a few more pics.
And it's in!
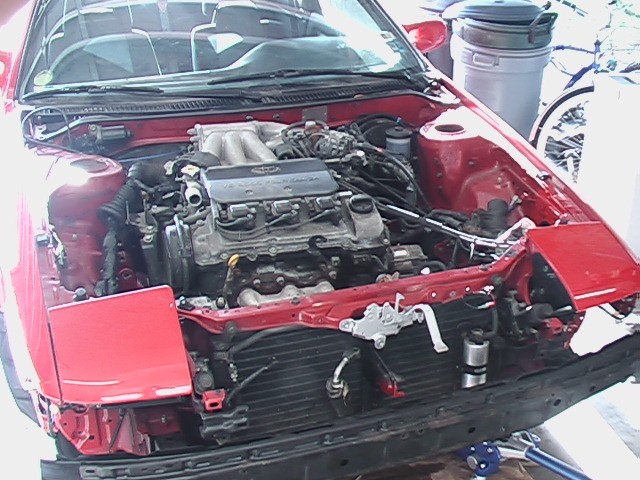
Well, not quite. It's a little crooked and there is a lot to do to make it sit there the right way, but you can see that it WILL fit.
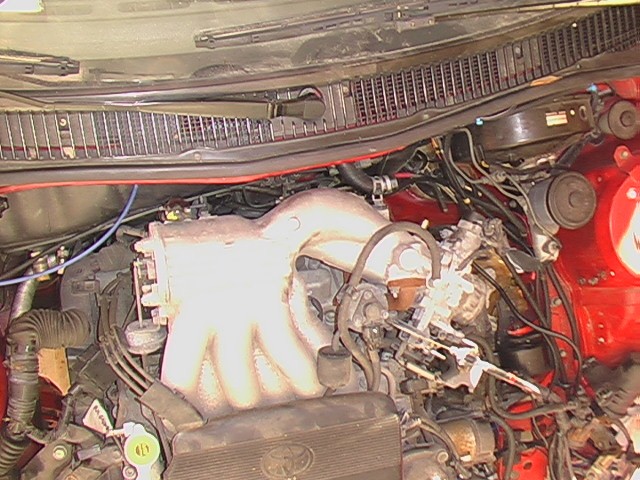
You can see there is a lot going on between the engine and the firewall. Some of this will have to be addressed.
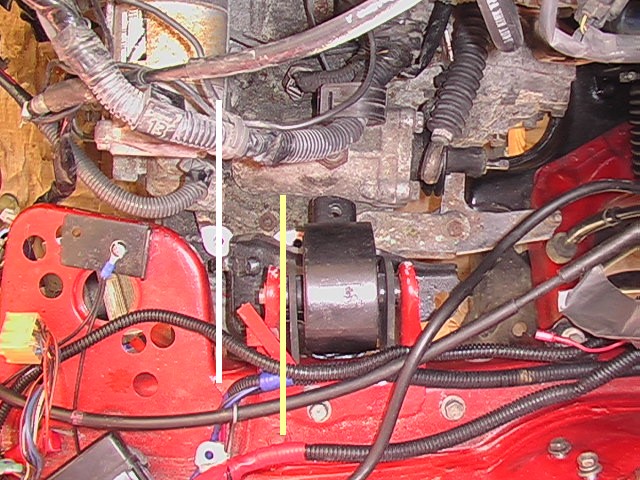
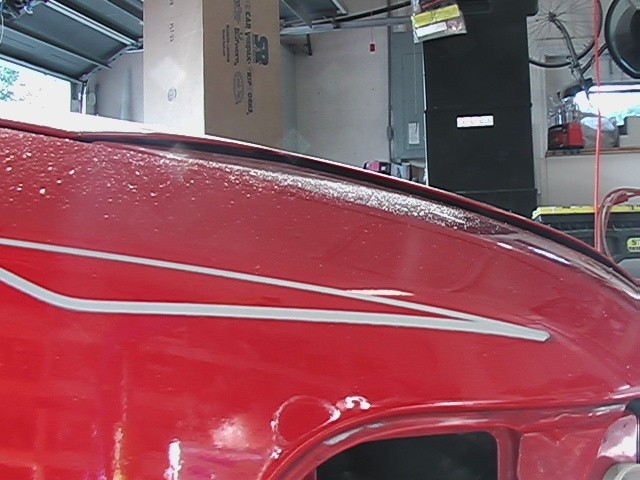
In the following two pictures, the white and yellow lines should coincide. So the engine should move backward a bit.
In the following two pictures, there is interference at the white arrows. In the first one the EGR pipe hits the power steering rack and in the second one the power steering hose is crushed into the firewall. The photos were shot from opposite sides of the car.
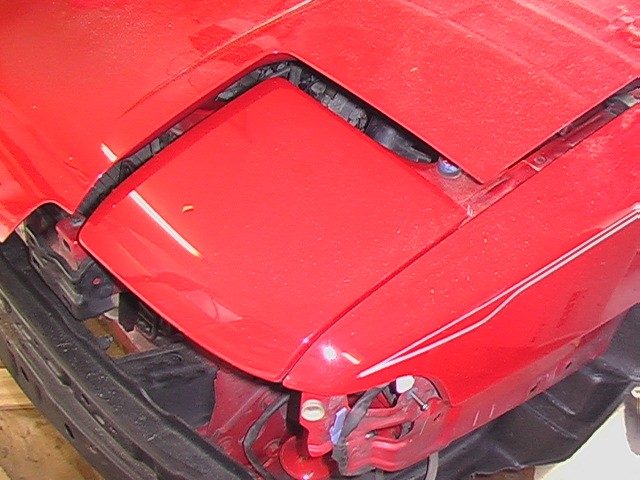
I thought I would check the hood. At this point the interference was in the wrong spot, because the engine wasn't properly located. In later pictures you will see that the hood actually interferes in the back, toward the firewall.
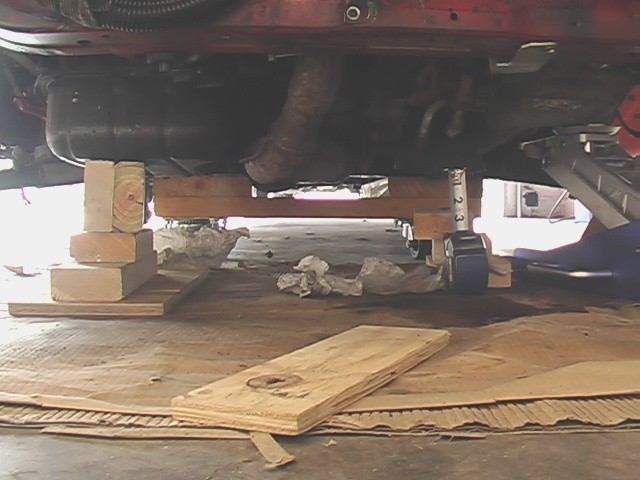
Here is the ground clearance. Actually the car is about 1.75" higher than it should be here, so the clearance from the bottom of the engine to the road will be quite small.
The Solara transmission is supported from the bottom, but the Corolla transmission is supported from the top. Because the housing is the same, it was no problem to put the Corolla mounting bracket on the Solara transmission.
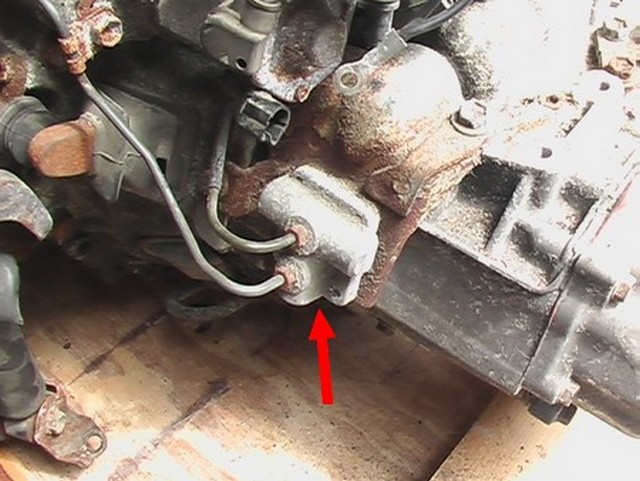
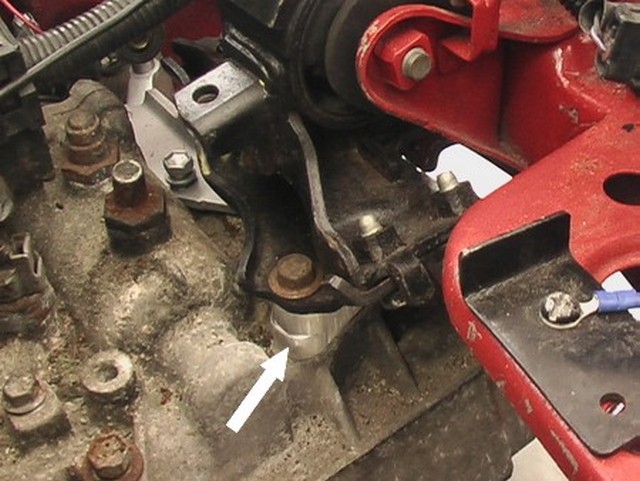
However, this clutch thingy was in the way. You can see how the bolt on the right (upper right, not the red arrow) is needed by the transmission mount. So I removed this part. I'm not really sure why it's necessary, but I will probably reuse it. I'll just have to figure out how to mount it.
The throttle was another part that interfered. I was able to rotate it downward by moving the top bolt to the bottom position.
You can see the result here, but I'm not happy with that. A little piece still sticks up and when the hood closes, the engine will race. I still have to figure out what to do about that.
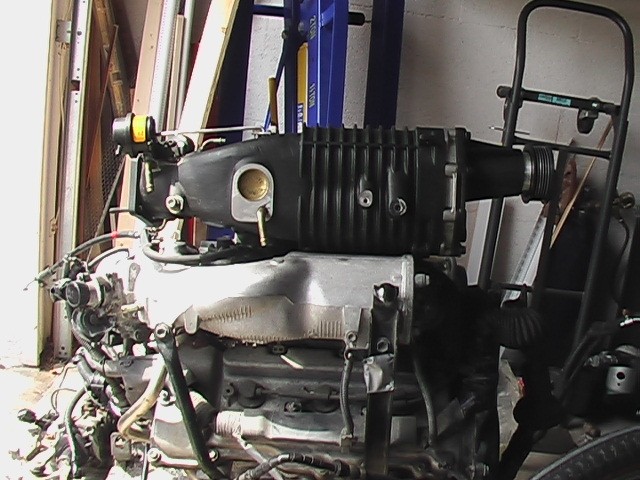
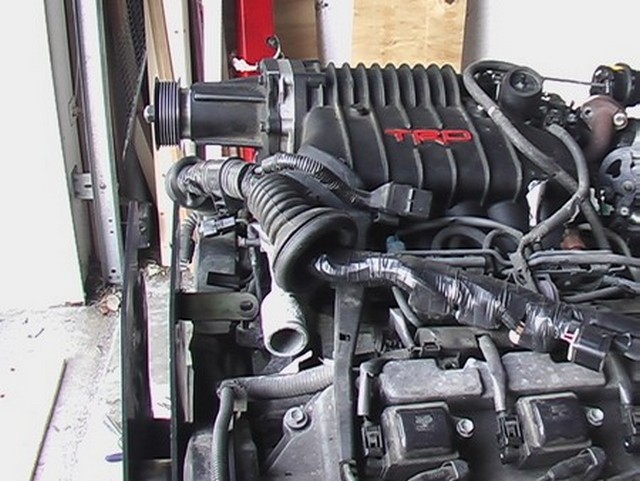
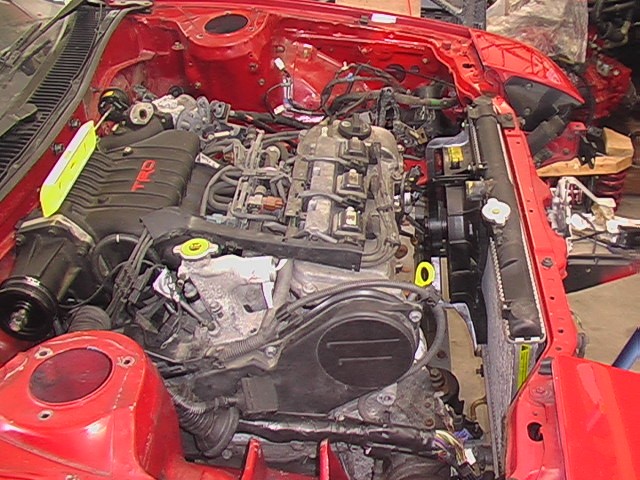
Next, I wanted to see if I could fit the supercharger under the hood. Here's a picture of the supercharger on top of the normal manifold.
It looks like the supercharger is quite a bit taller than the intake manifold from these photos, but in fact, most of the extra height goes in the downward direction. I think it is about 0.25" higher than the intake manifold.
The biggest problem is that the snout of the supercharger sticks out a lot. This is a big problem. It keeps me from putting any kind of stiffening between the strut tower and the firewall. A lot of cars come with strut tower bars, but few of them tie into the firewall. This is one of the things Toyota did right on this car. A strut tower bar that just goes between the struts but doesn't tie into the firewall is next to useless. I provides only minimal support. The best arrangement is one that ties into the firewall AND the front of the car.
While I had the supercharger down from the top shelf, I put it on the scale. The whole box, which had maybe a pound or two of extra stuff in it, weighed 45 lbs! Ouch. Of course, that's not all added weight. The intake manifold comes off, but I'm pretty sure it's not an even trade.
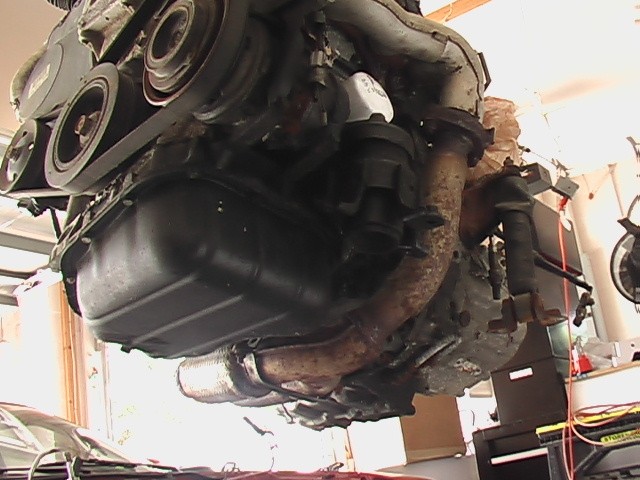
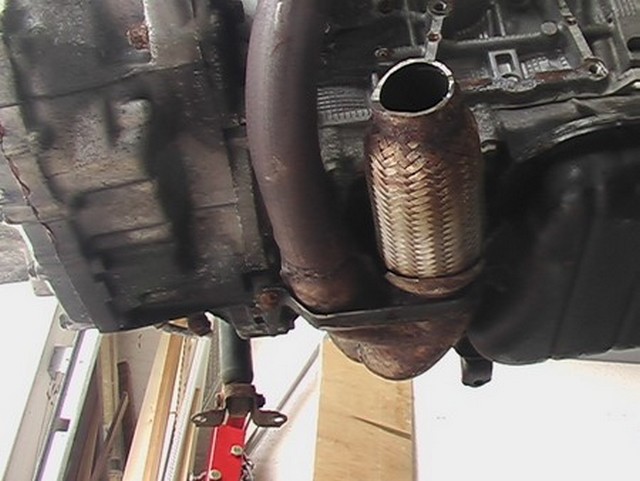
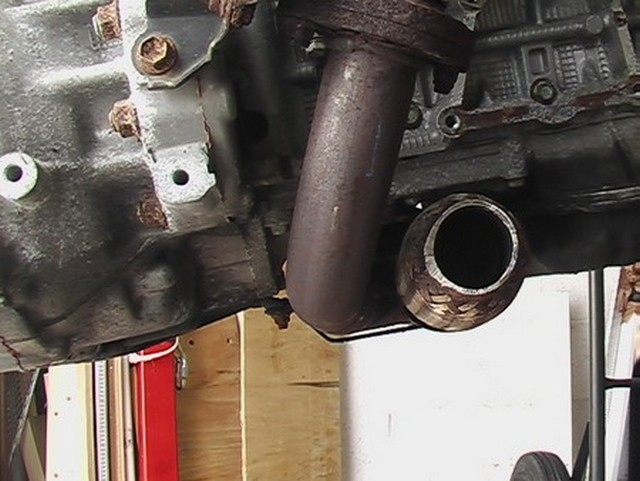
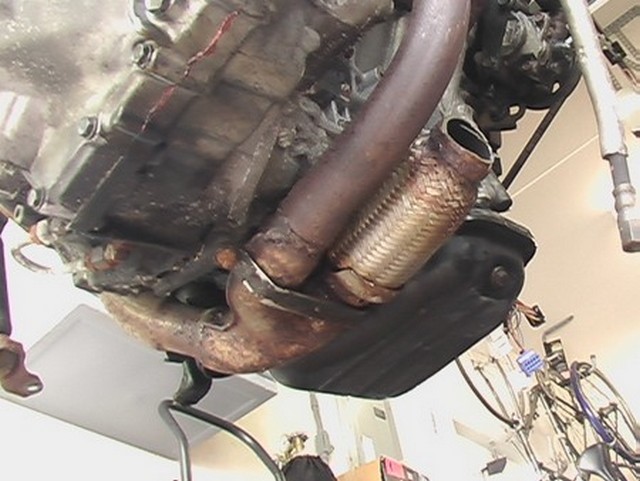
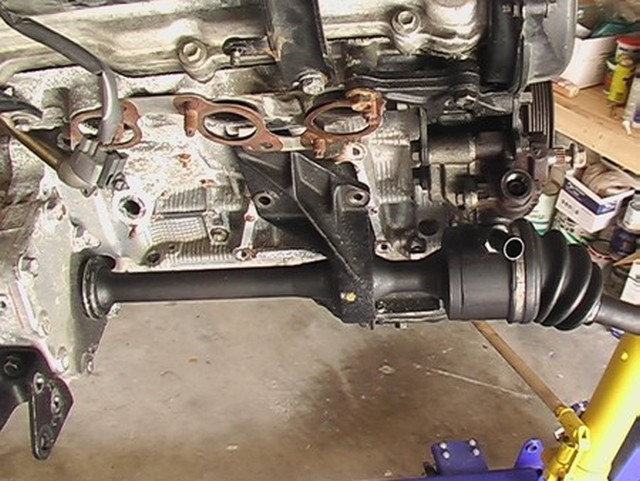
Here are some shots of how the exhaust passes under the engine.
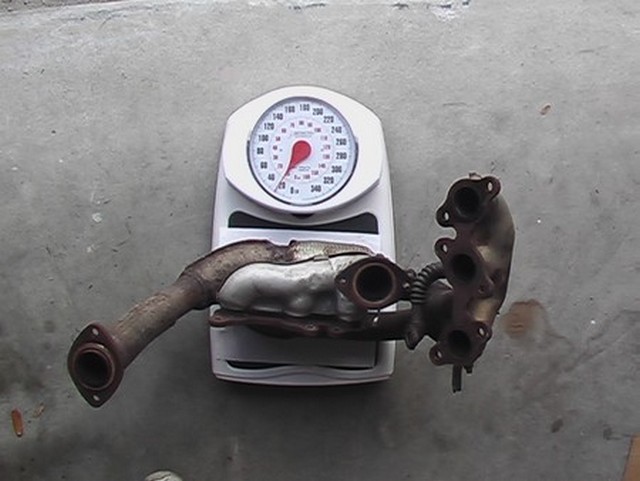
Once I removed all of that stuff, I put it on the scale naturally. It felt pretty heavy. At 23 pounds I guess it is.
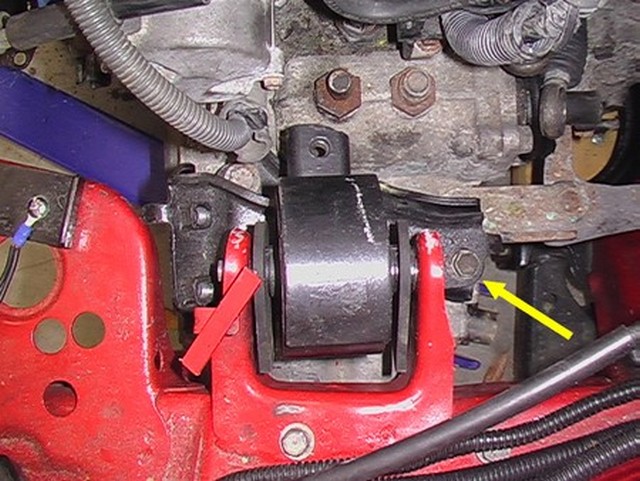
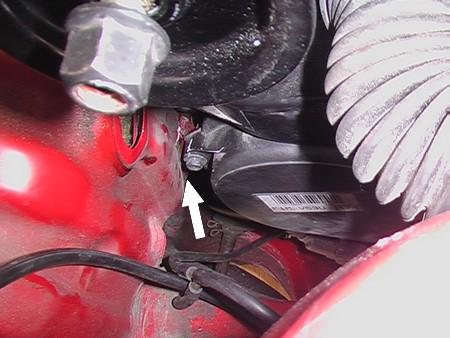
After removing the exhaust manifold, I was ready for round 2. I dropped the engine in again. This time I managed to get a bolt into the transmission mount (yellow arrow). But I had three different interference problems.
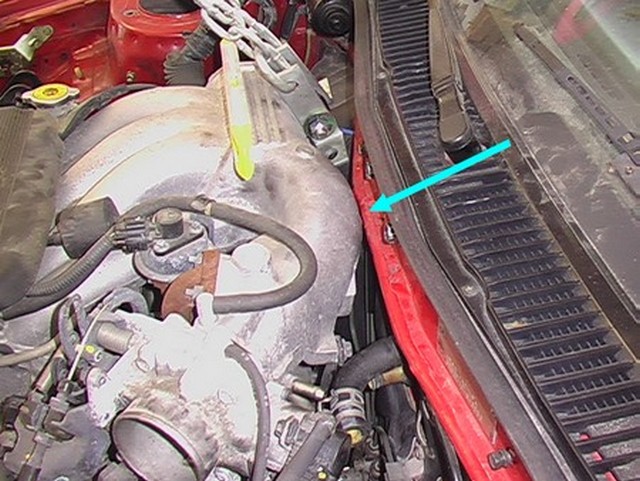
The first was at the firewall where this little lip sticks out (blue arrow).
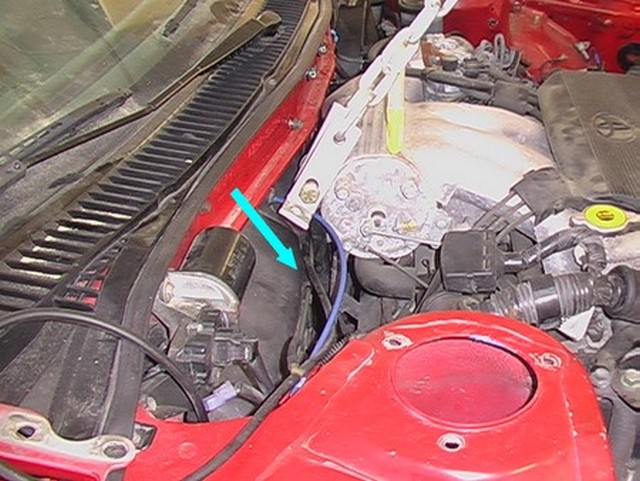
The second was also on the firewall. The engine lift point is a long bracket that is pressed up against the firewall and also on the brake line (blue arrow). The brake line isn't too much of an issue because I am replacing all of them anyway, but at the time I think the firewall was an issue. Now I'm not positive it was, because I didn't realize at the time that the engine still needed to be positioned a little differently to be in the right spot.
Since the engine was almost in, I did another fit check of the hood. Still no-go.
It fit much better than the last time, but still quite a bit of interference. This time the interference was on the timing belt cover with further problems at the forward-most coils and just a little bit on the throttle still. I decided to lower the engine position in the car. If the engine got too close to the ground, I could raise it in the suspension. Obviously I can only go so far with that. I don't want my car to look like some kind of redneck truck. If that doesn't work hopefully I can do some work on the underside of the hood. Before that though, the engine must go backward a little bit where it hits the firewall. I think I will need to create at least one inch of clearance rearward.
The plan is to have the car repainted when I'm done. I thought I would remove the engine so the engine bay could be painted. While the car is gone I could work on the engine. So I had planned on putting the supercharger on at that time. However, I needed to make sure it would fit under the hood. So I decided to put the big parts on the engine.
So there it is. What I can say at this time is that I recommend against using the supercharger. While this is the only thing that's going to get me above the 200HP mark, it really makes installing the engine more difficult and I think I mentioned before that it more or less prevents me from using the valuable strut tower brace.
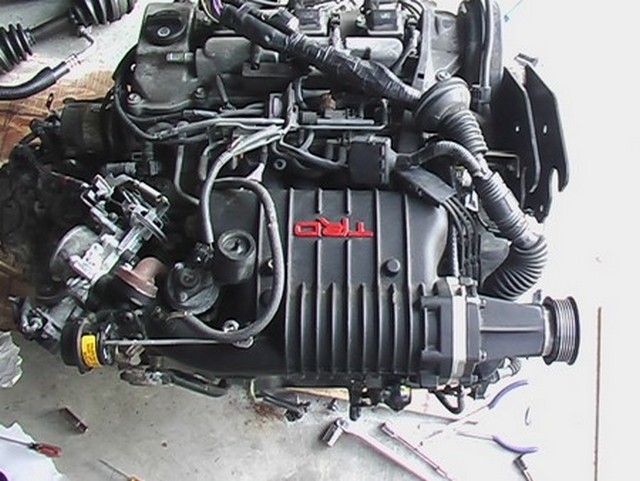
The supercharger may have helped solve one issue though. It doesn't have that little bump in the back that was interfering with the firewall. You can see in this view how flat it is across the back (bottom in the picture).
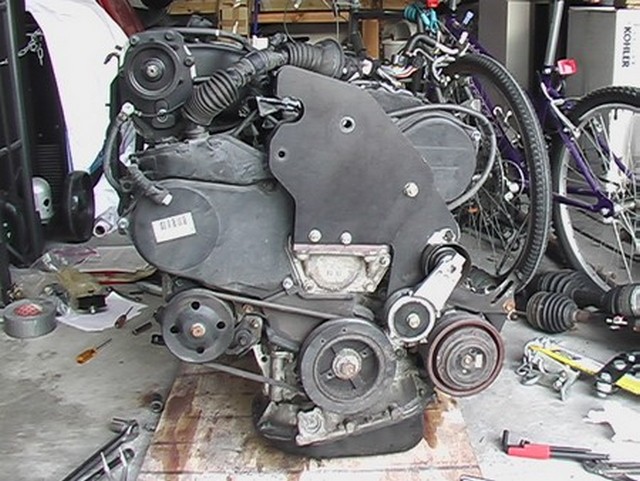
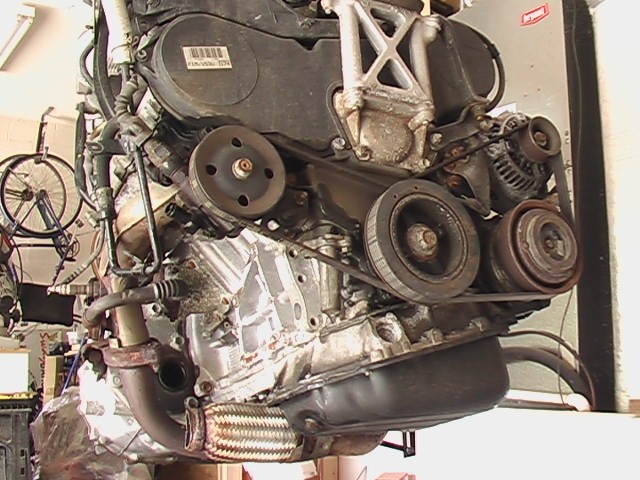
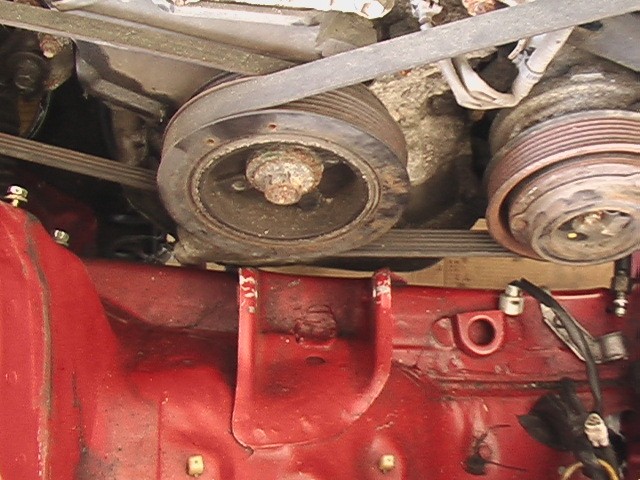
This pulley setup on the front of the engine, that replaces some components, looks very beefy and I figured it would contribute a lot of weight, but it is made of aluminum and weighs in at only 6 pounds. I think I can live with that.
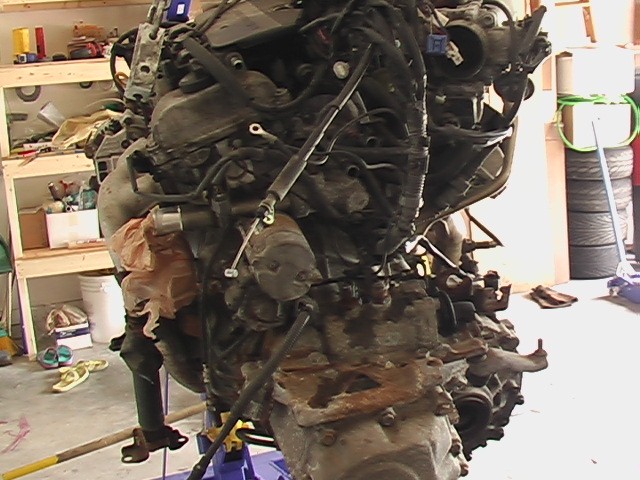
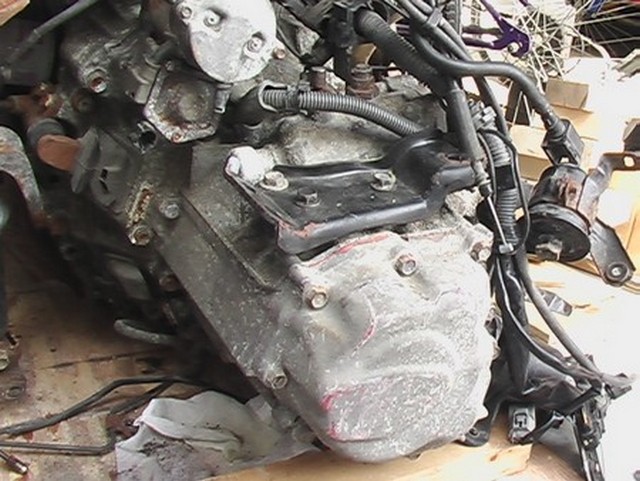
You might have noticed that the engine looks pretty dirty and corroded. Don't worry, I plan to clean that all up before the project is done. Right now I have more important things to do.
By the time I installed the engine for the fourth time, I removed the brake booster to provide a little working room and I removed the heat shield and the brake line that was interfering.
Here's another pic. At this time the brace that runs from the front to the back under the engine is still in place.
The heat shield was easier to remove if I cut it into two pieces. It doesn't look like much of a heat shield. It's full of holes. I haven't decided at this point if I will reuse it or try to create a different heat shield.
Originally I made two shims (white arrows) that I placed between the transmission and the transmission mount, which would push the engine down 1" and give me plenty of clearance for the hood. DON'T DO THIS! You cannot drop the engine down this much. It causes interference between the CV joint and the suspension. The most I could do was 0.5" and even with that I'm still concerned that things might flex enough for the shaft to hit the car. That would be bad.

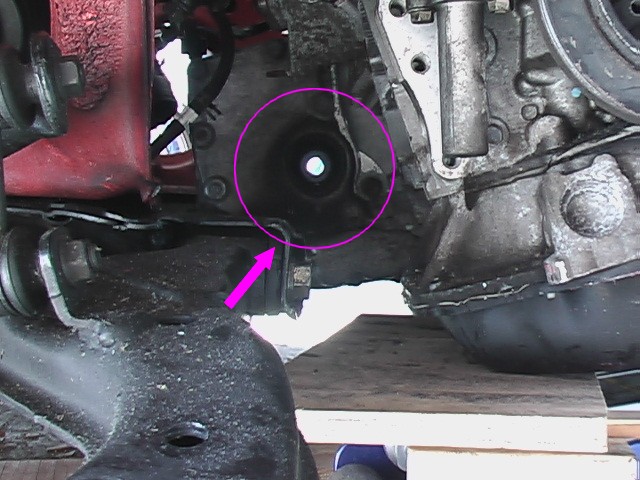
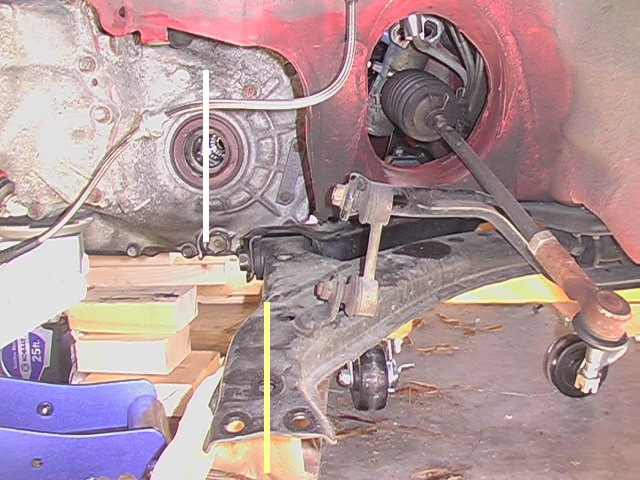
This is what I'm talking about. This is a view from the right side of the car. The circle represents the diameter of the CV joint at the point where it is near the suspension. With a 1" drop in the engine, the CV joint will interfere with the suspension at the arrow.
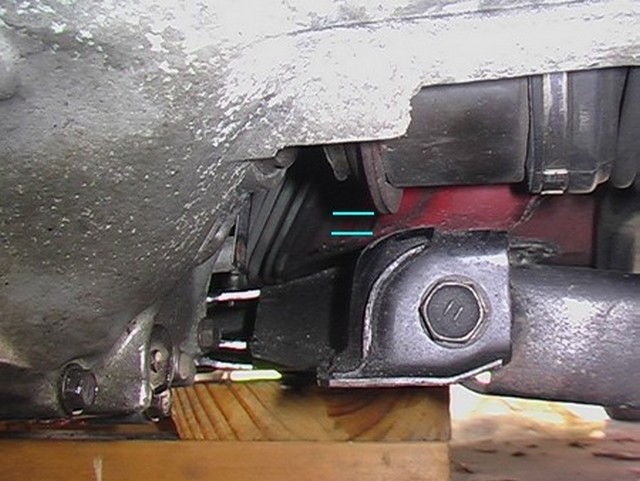
Here is a shot of the inboard CV joint on the left side of the car. There are two little blue lines that represent the clearance between the shaft and the suspension. This is AFTER I removed one shim. So this is the clearance I have by lowering the engine 0.5".
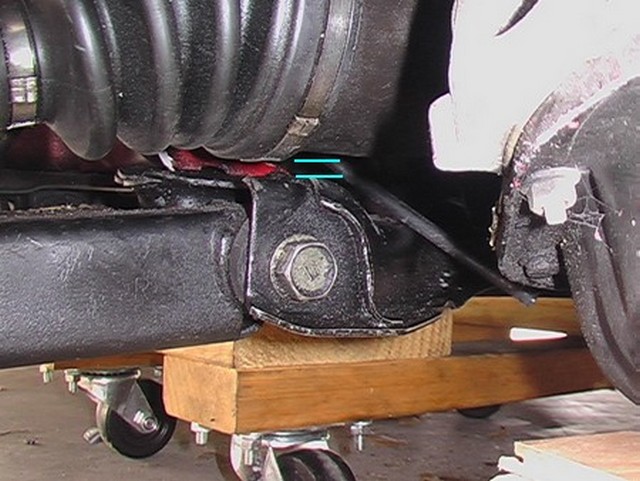
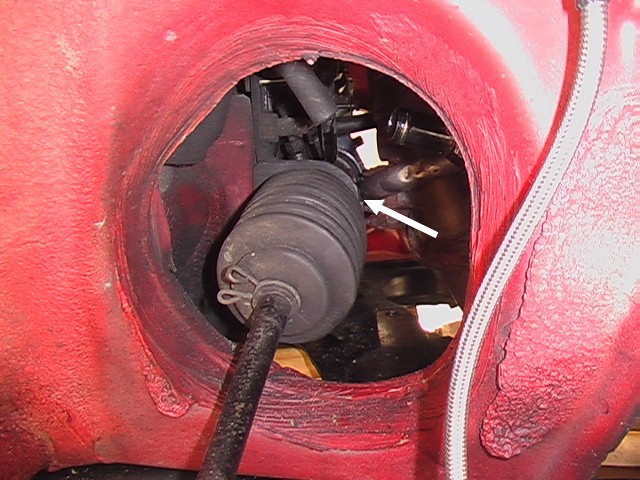
This is a picture of the right inner CV joint. As you can see it is very close. This is where I put it and it makes me a bit nervous. Cars flex when you drive and corner heavily. I just don't know how much.
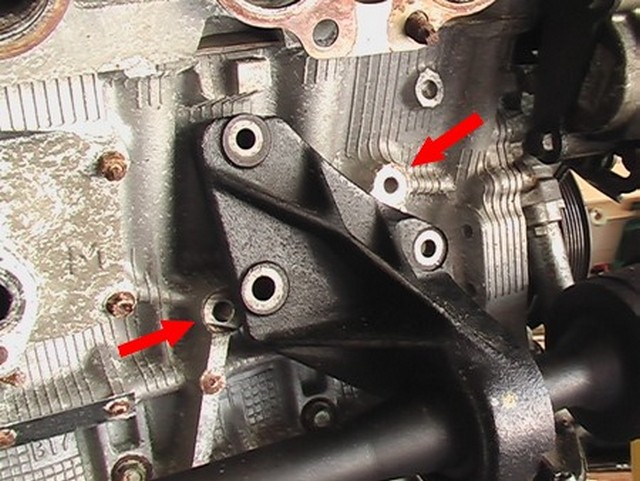
By the fourth install the supercharger was on the engine. This time I had interference between the differential and the lateral support (white arrow).
So I cut a notch out of the lateral support (blue arrow). The motor was sitting crooked in the engine bay and needed to move a little more toward the firewall on the right side. The cross-member was keeping it from moving. This seemed odd to me, because I believe that the portion of the transmission that was hitting was identical to that of the Corolla transmission. But I removed the engine and cut out this piece of the cross-member for clearance. WARNING! DO NOT DO WHAT I DID! Later, when I rolled the engine forward, several things happened. First, the back dropped down and seemed to solve some of my hood clearance issues at the firewall. Second, the differential cleared the cross-member by a large margin. Cutting the cross-member was completely unnecessary. It took time and effort and resulted in me cutting into perfectly good metal that I later had to weld up to make right again. MAKE SURE YOU HAVE ADJUSTED EVERYTHING BEFORE YOU CUT METAL! I'm not happy with myself. I should have listened to my gut and made more adjustments before rushing into cutting metal. It seems however that every time I install the engine I get different interferences. Some go away and others appear. I will be happy when the motor mounts are in, so that the engine location becomes fixed. This is just the kind of thing you go through when you have to position an engine that wasn't designed to go here. I'm learning.
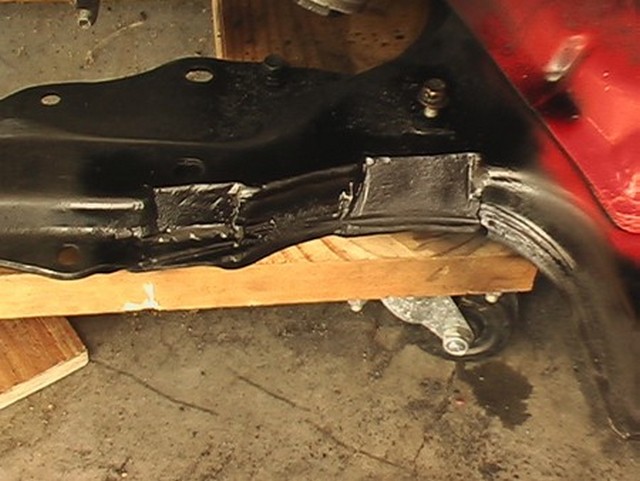
Later I pulled out the welder and fixed the notches.
At one point I had the engine in the air and decided to look down the exhaust ports to see what I could see. The front-most (toward the pulleys) exhaust port on the number 2 cylinder seems to be a little wet. Kind of strange that the rear-most exhaust port on the same cylinder isn't. In fact all of the others look the same. I hope this is not a problem. I took pictures, but they are too low res to really see the difference. My plan is to clean them and nothing else. Well, I also plan to remove the valve covers and I hope I don't find any sludge in there. All I know is that the engine was running very well before I shut it off for the last time. We'll see.
June 10, 2010
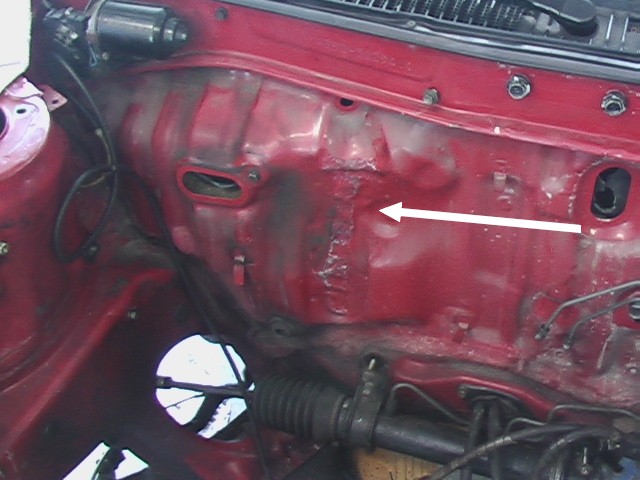
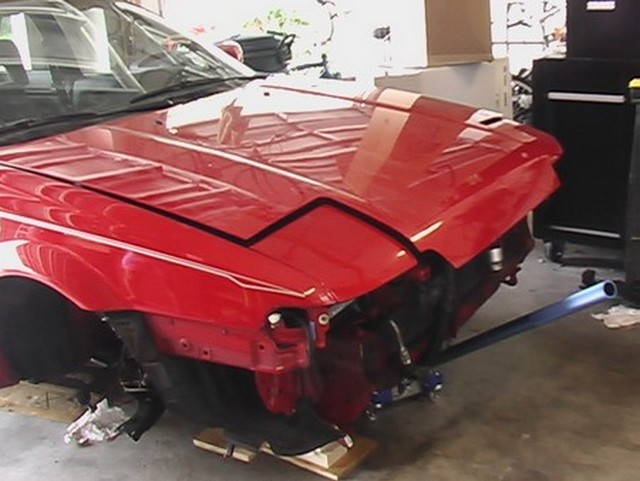
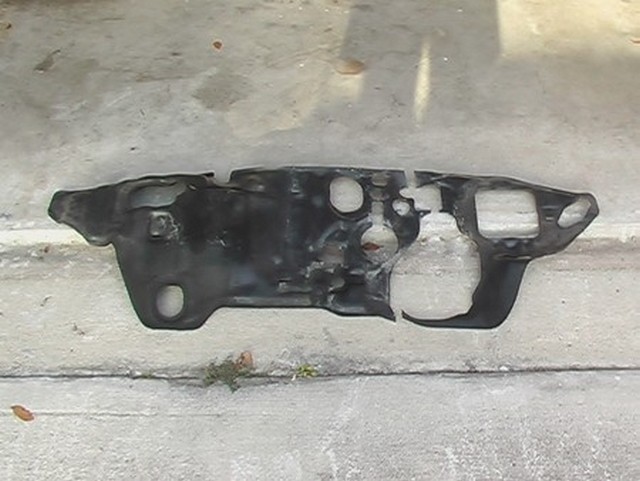
I put the engine in and out several times finding the obstacles and removing them. The firewall was still a problem and I opted to to bash it in with a sledge hammer instead of cutting it. It's not as pretty but it keeps me from having to grind it down, weld it up and subject it to possible rust, plus the interference was only in a small area and not that severe. Here is a picture of the firewall after I bashed it.
I felt really bad while I was hitting it. Here I am trying to improve my car and I'm taking a hammer to it. Plus it doesn't look pretty, does it? It shouldn't matter in the end. It will either be bondo'd in or covered with heat shielding. Still I felt aweful.
I test fitted the Corolla driveshaft in the E153 transmission while the engine was in the air. It looks like it won't be too hard to make a plate to secure the bearing. None of the holes line up though. If you are wondering, I can't use the bearing bracket from the Solara because the bearing is not in the same location on the shaft as the drive shafts from the Corolla. The bearing is also a cast piece which I don't believe I can weld to.
Here is a closer picture of the bearing support. The Solara shafts have this same bearing, but it is a different shape. The two red arrows point to the topmost bolt holes for the Solara shafts. There are two more off the bottom of the picture. As you can see the three holes from the Corolla don't even come close to lining up. I had to make an adapter piece. You can read about that in the motor mount section.
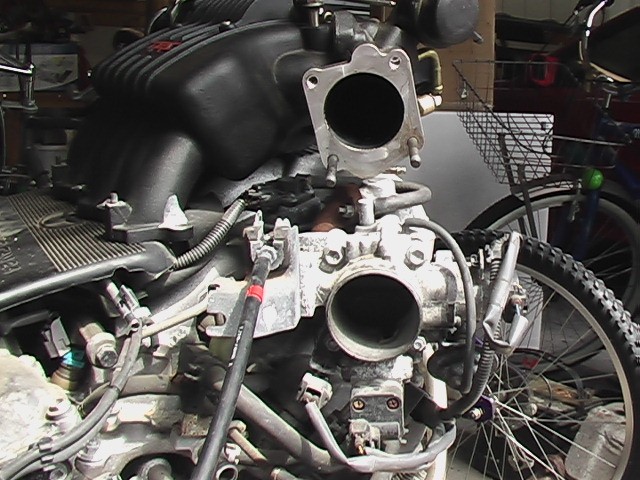
At this point the engine was in the right spot. I did not move it around anymore. Although there was a lot of room in the front, you can see that there is no room between the engine and the radiator fan for an exhaust manifold. Don't forget this ain't no four cylinder anymore. There is an exhaust manifold in the front AND the back.

This is what the hood looked like in the final spot. Not too bad, just a bit of interference toward the back on the supercharger.
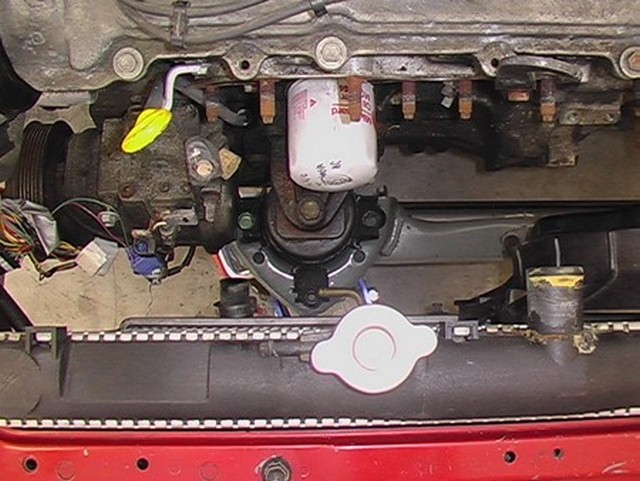
You can get a better look at the radiator/engine relationship from this top view. This radiator's inputs and outputs are not in the best location, so I went to a local radiator shop and told the guy what I was looking for. A couple days later and I went back and he had a much smaller radiator from a six cylinder car. It will fit almost completely on the left side of the car, in front of the transmission and away from the exhaust heat. I can't recall at the moment what the car was and I don't seem to have a picture. I'll add one later. The Solara radiator would have been nice to use, but it was about 3 inches too wide to fit in the Corolla.
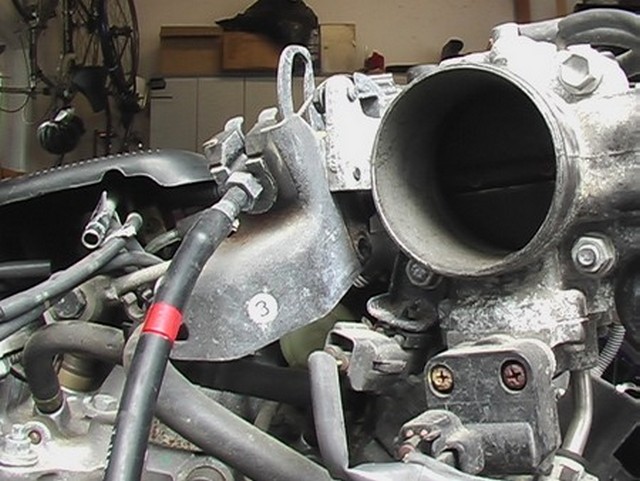
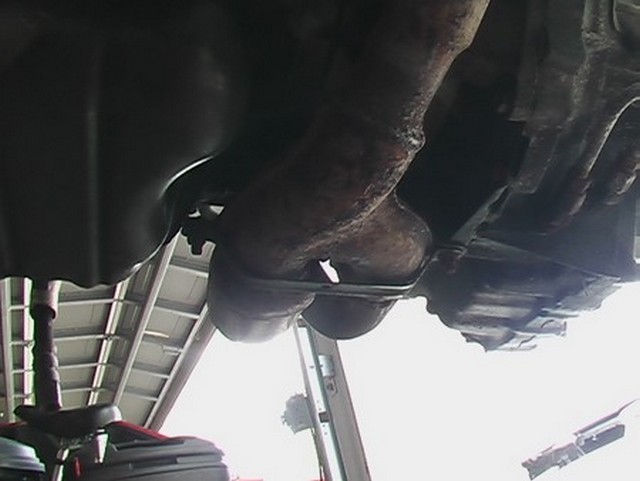
Here are a couple of pictures showing the kinds of interference problems that plague an install like this. You just have to address them all one at a time until everything works. It can be challenging.
That was it for the swap or at least for positioning the engine and getting things in place. Tune in to other areas to figure out how I made the rest happen.