
Interior
Steering Column
October 20, 2010
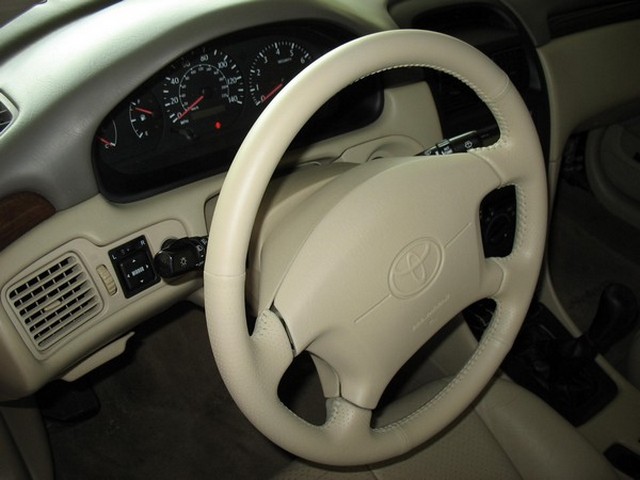
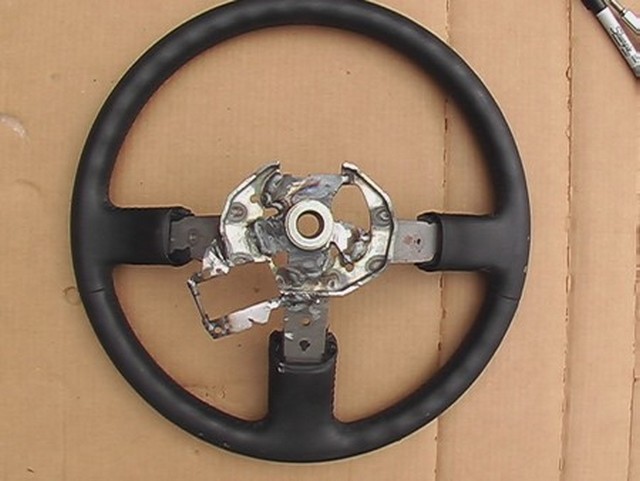
Here's the Solara steering wheel.
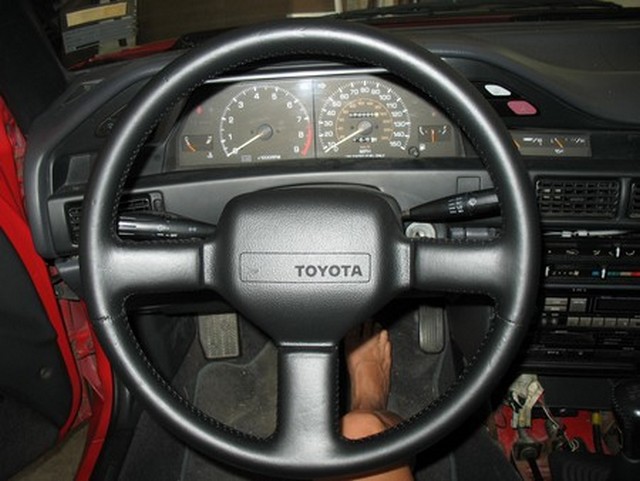
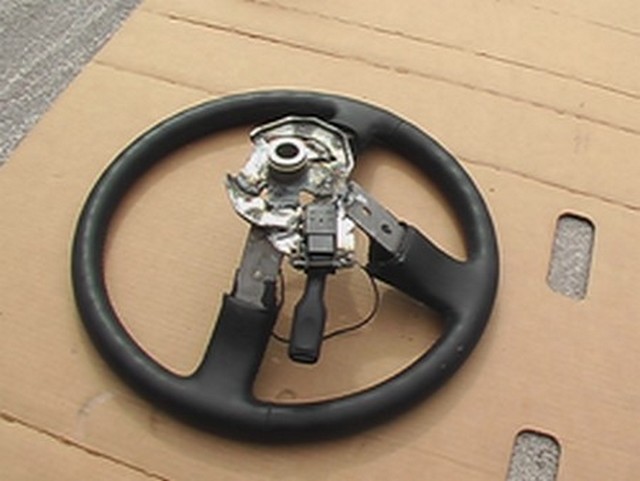
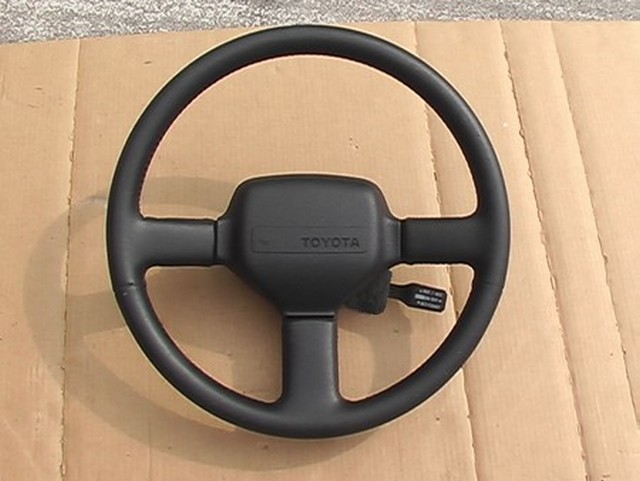
Here's the Corolla steering wheel.
I opted not to go with the easier and lighter Solara steering wheel. I just don't like the way it looks as much as the original Corolla steering wheel. That meant a few modifications in order to make things work. Due to Toyota reuse, I was super happy to find that the steering wheel, turn signal and spiral assembly of the Solara fit directly on to the Corolla steering column. Really it's just amazing that there is 14 years between the build date of these two cars, yet stuff bolts on. It's good for Toyota and it's good for me.
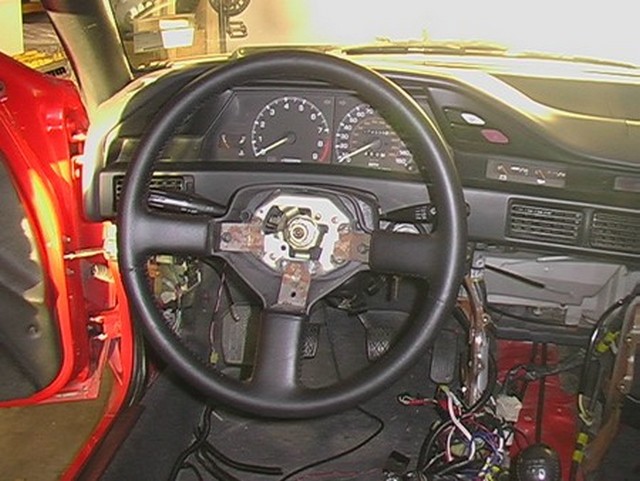
First the steering wheel pad/horn comes off.
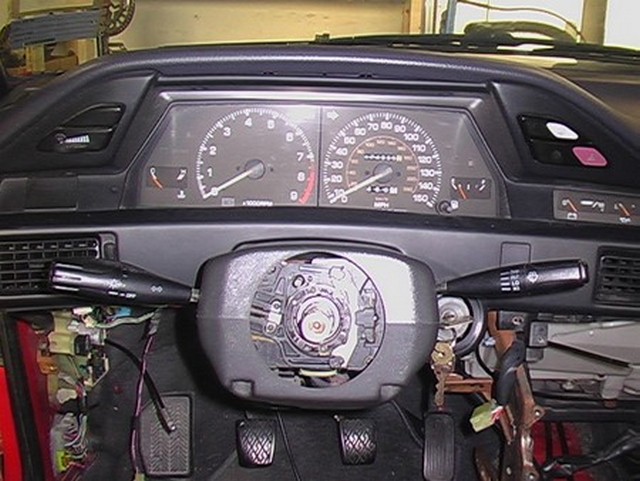
Then the steering wheel itself.
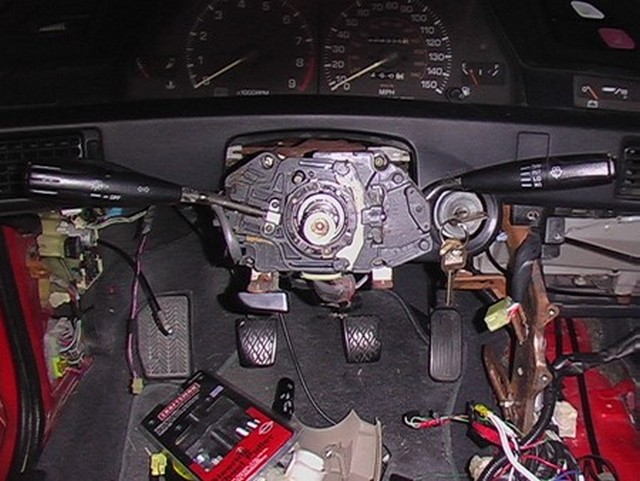
And finally the turn signals and covers. The turn signals are held on by the two screws on the top.
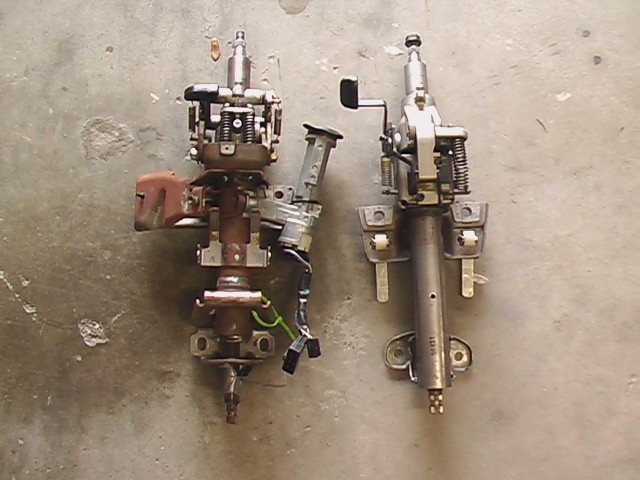
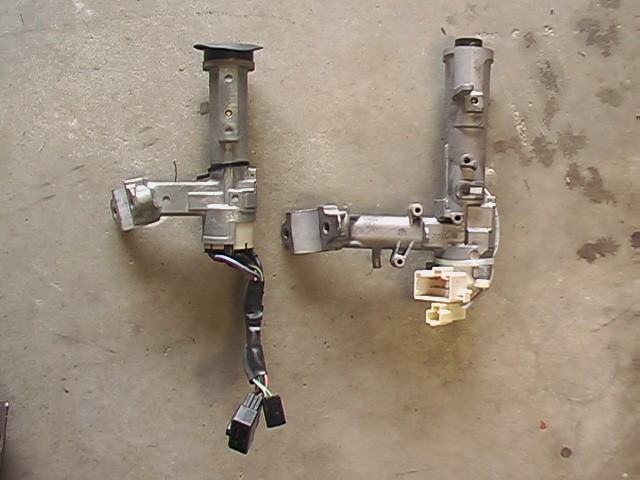
Here the Corolla steering column is on the left and the Solara steering column is on the right. You can see that 22 years of existence has caused the Corolla steering column to be quite covered in surface rust.
Also, at this point I had already removed the ignition switch from the Solara steering column. The ignition switch is held in by rounded off bolts so that it cannot be easily removed, as explained in the "Tear down" section. This made it hard to disassemble. I reassembled it with normal socket head bolts.
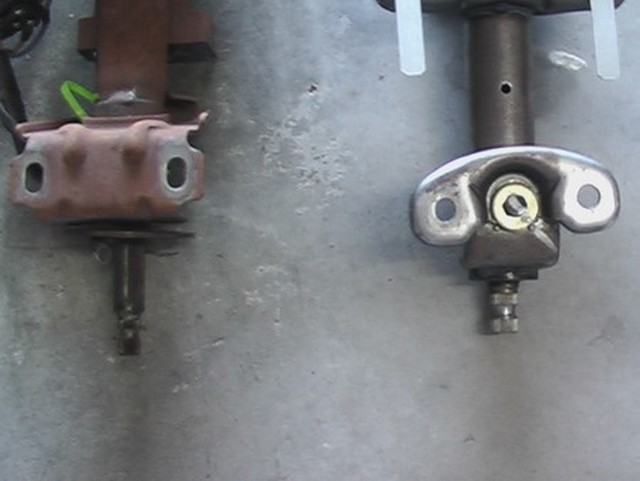
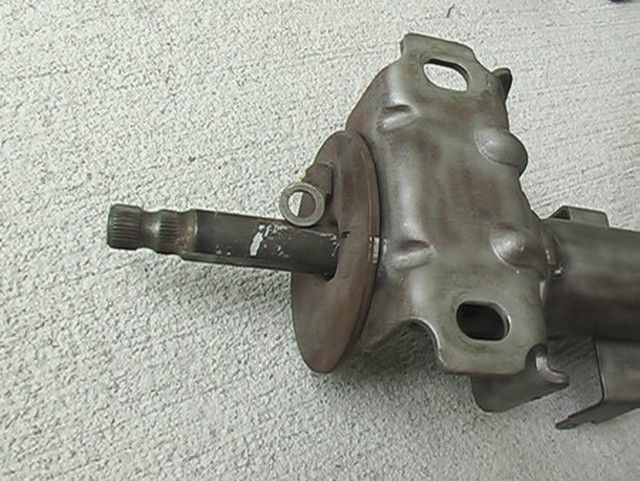
Here's a picture of the ends. As you can see, this is where the two deviate. The Solara, on the right in the picture, has a larger diameter shaft. Also the Corolla has this little plate at the bottom. I don't really know what it's for. Maybe to cover the hole in the floor?
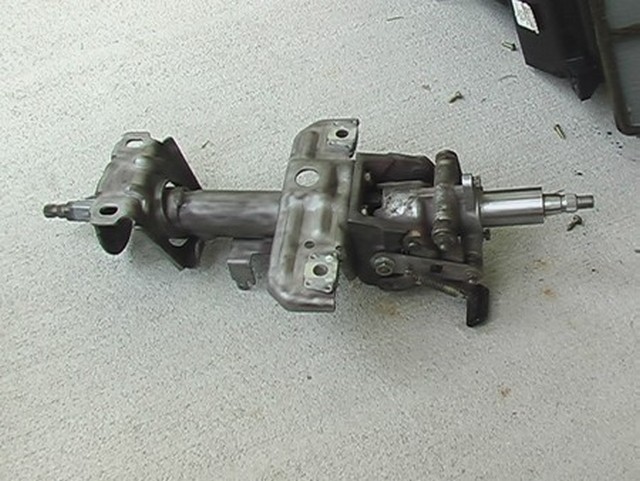
I'm using the Corolla steering column, of course.
Here are some pics after I cleaned it up a bit.
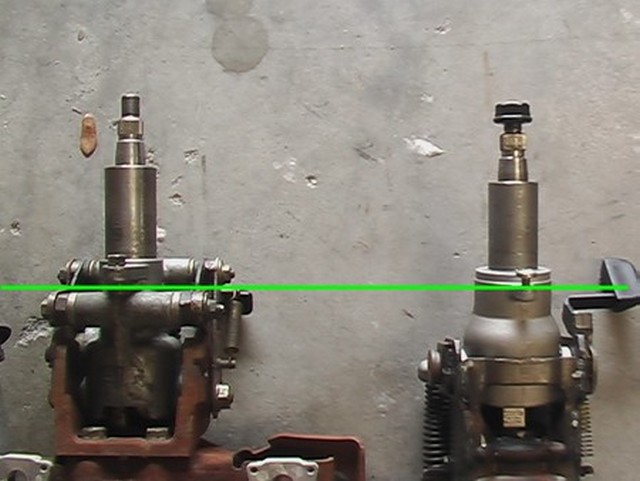
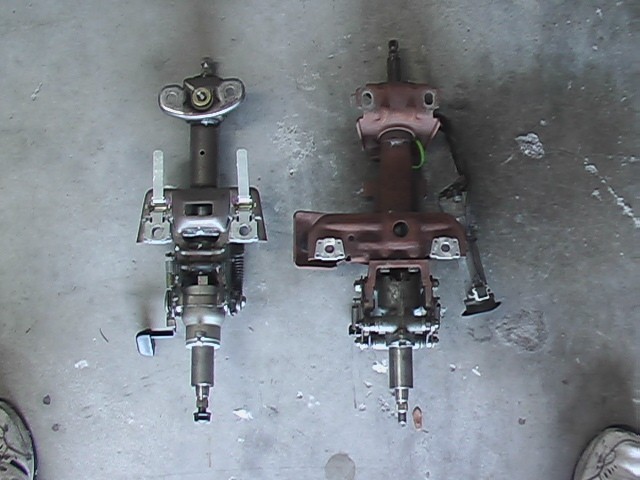
In the next picture you can see the two steering columns side by side. From the green line up, they are compatible.
Here is a comparison of the two ignition switches. Once again they are almost completely compatible. The Solara ignition switch is a little longer in both dimensions, but is virtually the same as the Corolla ignition switch.
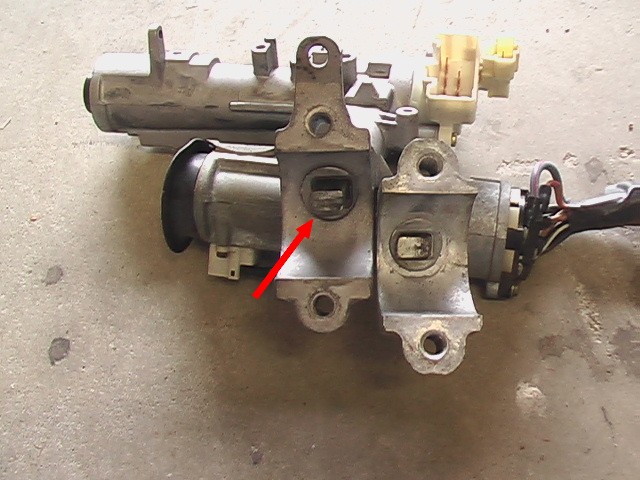
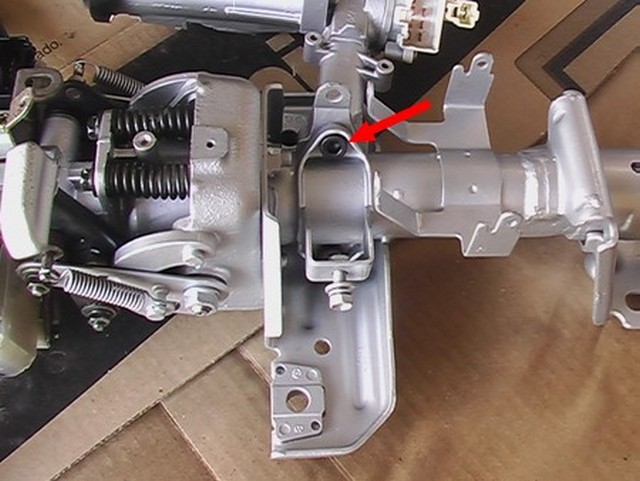
The only difference between the two that kept me from bolting the Solara switch directly to the Corolla steering column was the diameter of the little lip around the lock (red arrow).
The little circular raised area fits into a matching hole on the steering column. Naturally with the Solara ignition switch lip a little larger diameter, the hole on the Corolla steering column had to be opened up a little. I had a machinist at work do that, but some careful work with a grinder or dremel tool might have done the trick too.
The spring loaded pin at the center of that circle is a little longer too, but this won't make any difference, because it fully retracts when the car is started and when it extends, it will simply not extend as far, but the spring allows it to do this. It's not like a dead bolt that wants to extend all of the way. So with that one little modification, the Solara ignition switch bolted directly to the Corolla steering column!
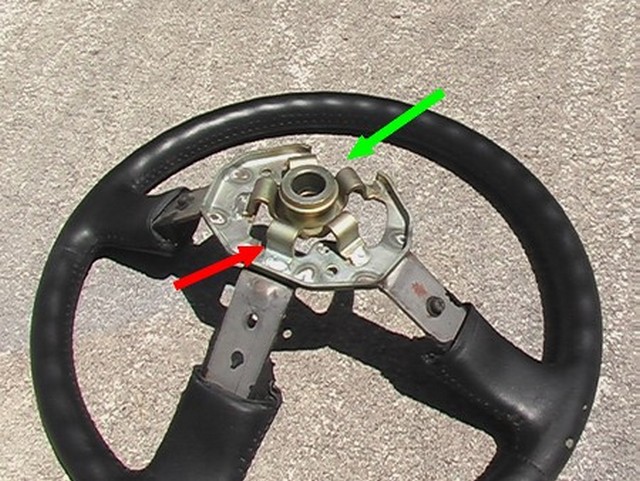
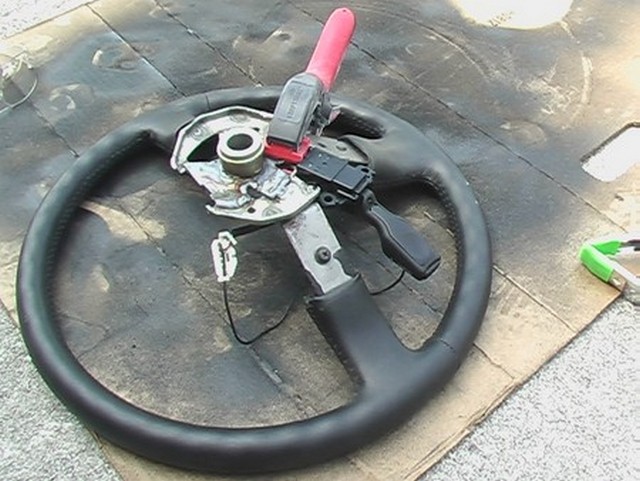
As I mentioned the steering wheels are virtually interchangeable. However, because I wanted to use the turn signal controls from the Solara instead of the Corolla, the Corolla steering wheel would not fit on because of these little curved pieces on the back side (red arrow).
I've already cut out a piece of the steering wheel to accommodate a connector from the Solara (green arrow).
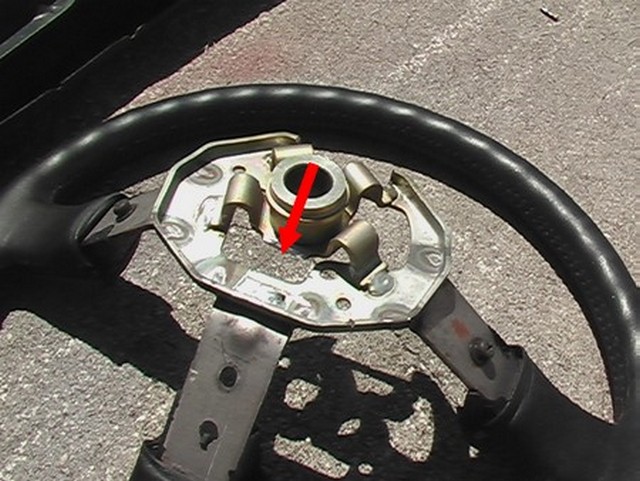
So I made some very careful measurements and decided I had to remove the little curved pieces. But I didn't want to lose the center of the steering wheel or make the splined hub crooked, otherwise my steering wheel would wobble all around when I made a turn.
I removed them one at a time and replaced them with flat pieces (red arrow).
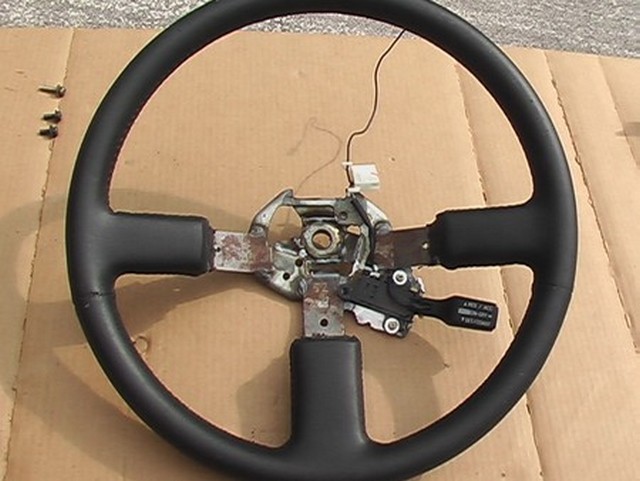
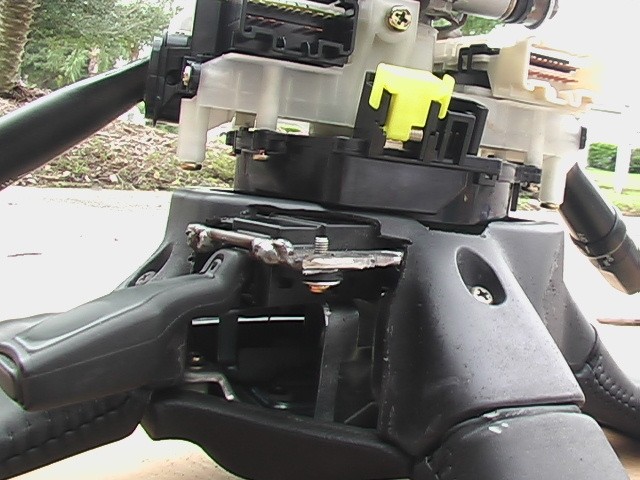
Once that was done I had to locate the cruise control switch.
To do this I took some measurements on the cruise control in my wife's Solara, then I used a little artistic freedom. When I got done I held it up and went for a little 'air-drive'. I think the position is good. Not too close as to get in the way, but not too far that use is uncomfortable.
I used some scrap metal I had around the house to make this little cradle for the cruise control switch.
Then all I had to do was bolt the cruise control switch onto the steering wheel just like it would in the Solara.
You have to be careful, if you do this, not to make the cruise control too close to the wheel because you will hit it when you try to turn a corner. The same can be said for making it too far, you will have trouble reaching it when you want to use it. I think I got it just right.

And here's what it looked like when it was done.
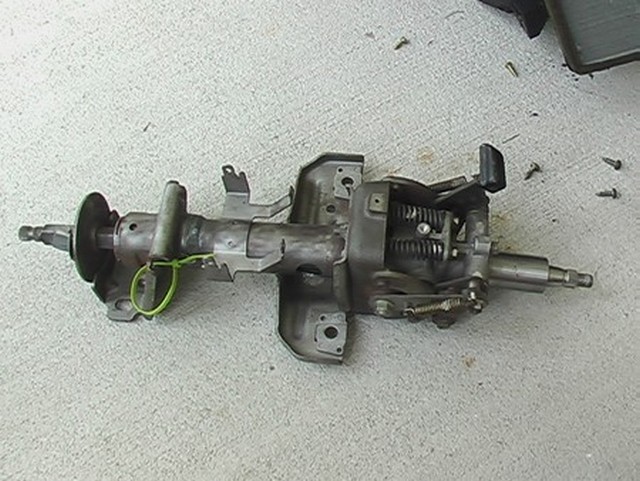
Here's a picture of the steering column all cleaned up and painted. You can see the socket head cap screws I used in place of the rounded tamper-resistant ones Toyota used.
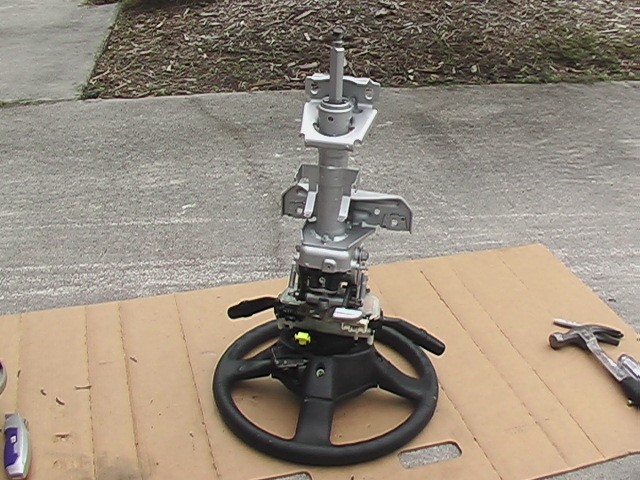
Then I assembled the whole thing to see if there would be any interferences, remembering that when the wheel was tightened down, it would draw closer to the rest of the steering column
I had to adjust a few things, but all in all it was a nice little package.
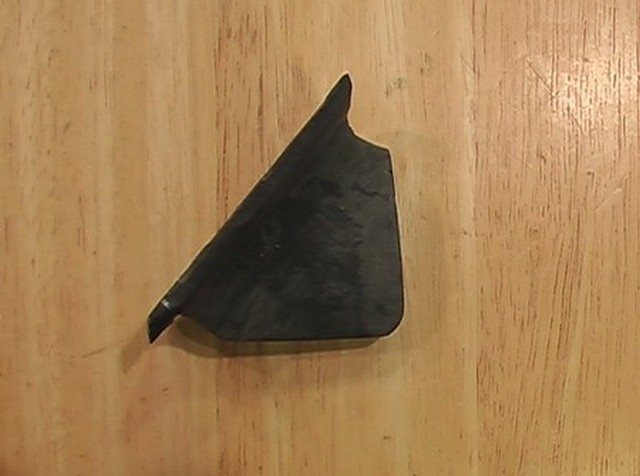
I had to cut a hole in the cover that surrounds the back of the steering wheel to fit the cruise control. This left a big exposed hole that would be visible from the passenger seat. So I made a little plastic cover for the cruise control.
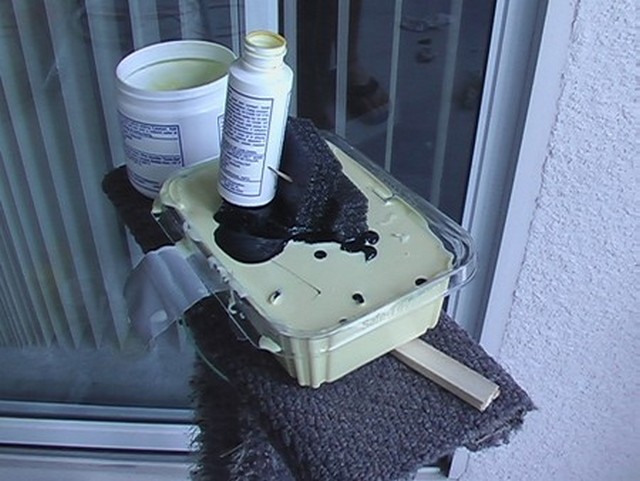
It's hard to tell what's going on in this picture. The yellow stuff is silicon. You can get it a hobby shops and craft stores, but the quality is not as good as getting it online at a place called Smooth-on. Either way the stuff is seriously expensive. I think I had to use two containers, which was like $60.00! That doesn't even include the cost of the actual plastic, which is also expensive. The best one I've used so far is called Onyx. It is also from Smooth-on. The black stuff with the tooth pick through it is some squishy packaging foam. I cut the foam into the shape I wanted, or at least as close as I could get. Then I stuck it in the container, poured in the yellow silicon and waited for it to harden. The silicon stays rubbery so when it was done, I pulled the foam out and had a mold of my part. But in this case, I needed a hole in the middle of my part so I cut a different piece of foam, placed it inside the mold I had made and poured black plastic around it. That's what you see here.
One recommendation I have is, if you are about to pour plastic, you should have a slew of odd things you might want to make, even if it's just for fun, because usually you mix up enough mold making silicon to surround your parts but then you have extra, so if you put something in the extra you can then make plastic versions of them. Maybe you want to see what a nut or bolt looks like made of plastic or you want to make a little funny shape for your kid. Doesn't matter.
So I don't have a picture of the finished product. Hmmm. Let me go take one. I'll be right back.
Ok, I'm back. Did you miss me?
I know it doesn't look like much, but I am not done sanding it and once I am done sanding it, I have to paint it.
The finished steering wheel should look something like this.
Using my not-so-great photoshopping skills.